Wednesday, February 16th, 2022 by Leonardo Braga
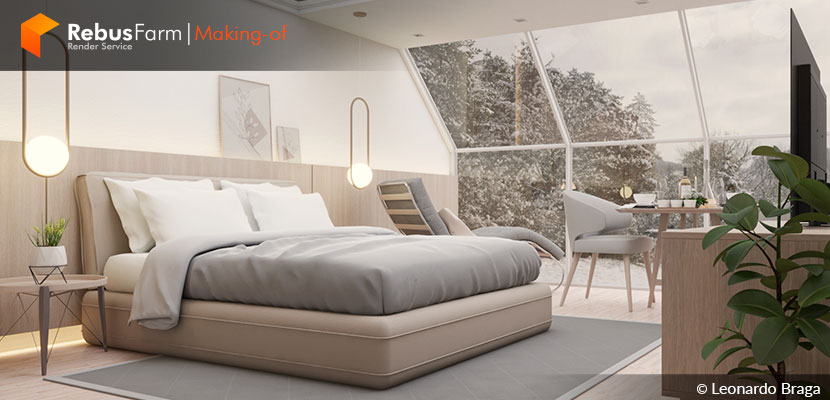
Living proof that practice makes perfect, 3D artist Leonardo Braga has been working on 3d modeling since he was 15 years old. Today, he shares with us an inspiring story, where he started a personal project during the pandemic after realizing it was not possible to go on a desired getaway. After realizing he was confined to his own house, he decided to create the 'Getaway Cabin' series, letting his imagination take him where his body couldn't go.
Let's hear about the process of creating a perfect getaway space.
Some words about me and my work
Hi everyone! My name is Leonardo Braga and I am 3D artist and civil engineer from Brazil. When I was 15 years old, I met Google SketchUp and started modeling things just for fun. During college, I always tried to present my projects using not only CAD visualization but 3D visualizations as well, this way I have always been in touch with 3D modeling.
About 3 years ago, I got my bachelor's degree and 6 months later I took courses about SketchUp & V-Ray and started freelancing some projects in my hometown. After that, things ran well and I founded my own studio, DREAM 3D, in early 2020.
I am passionate about 3D visualization and all the possibilities and challenges the industry presents us.
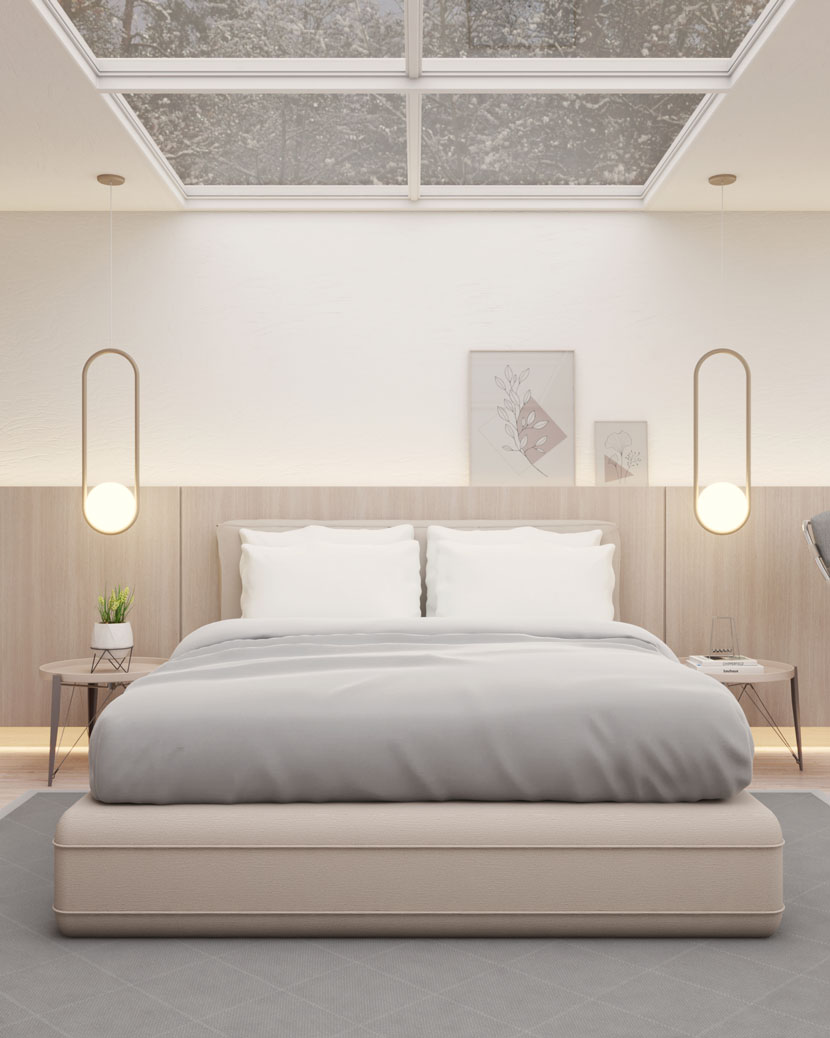
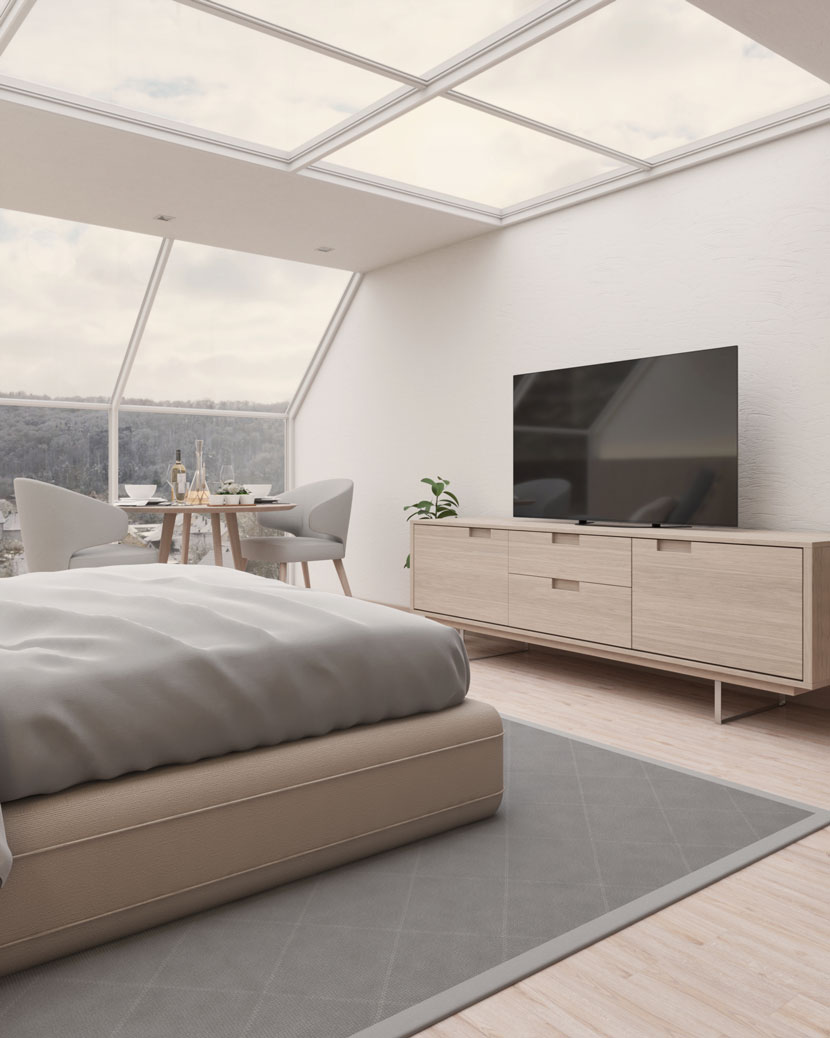
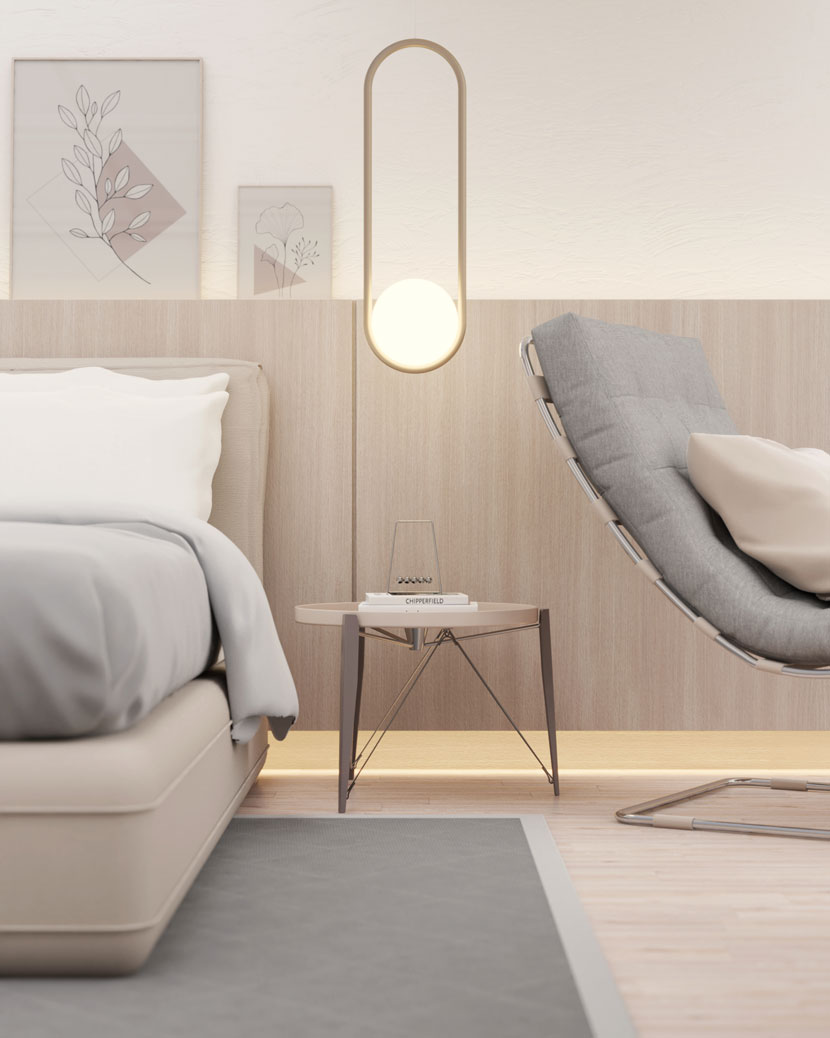
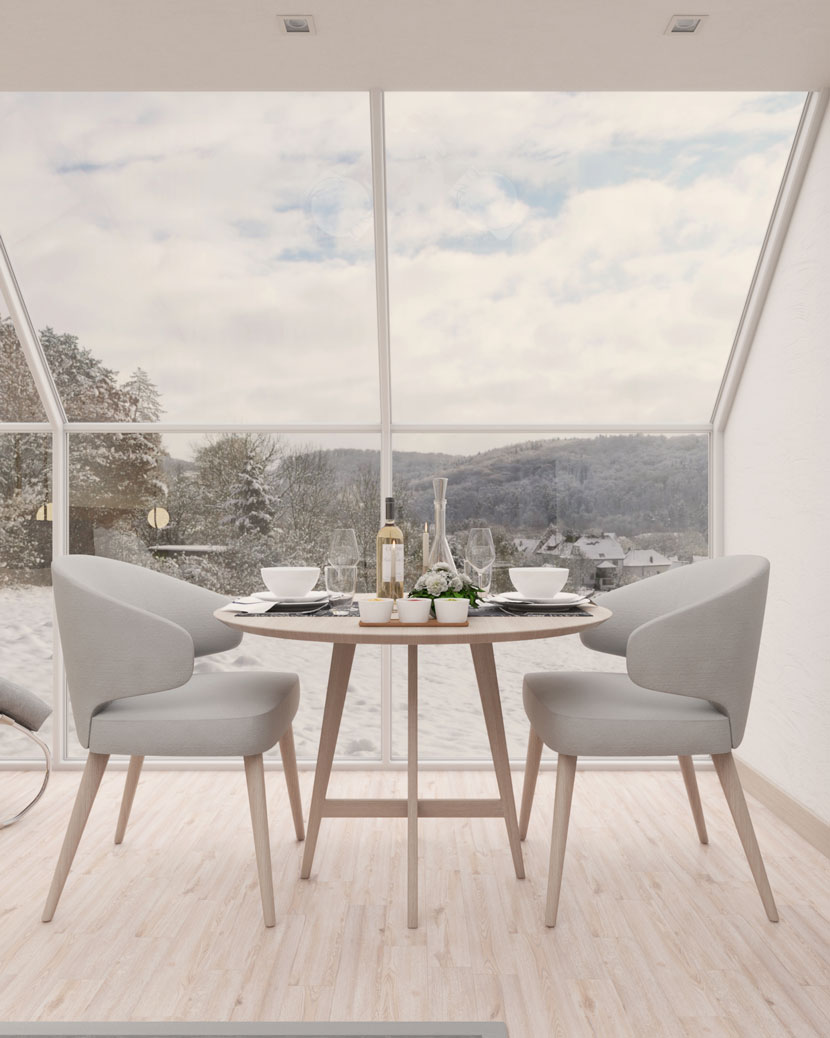
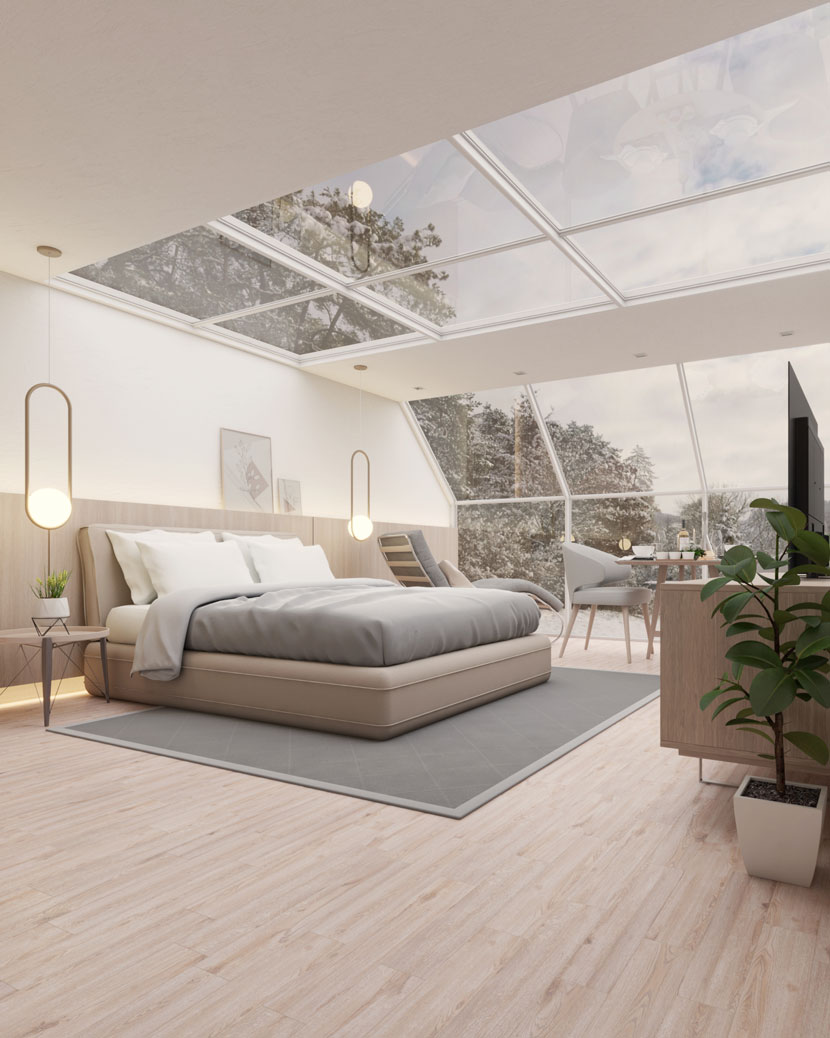 Example of visualization, 'Getaway Cabin – Bright Version'.
About the project
"Getaway Cabin - Bright Version" is a personal project of mine and it is one of the projects of the "Getaway Cabin Series". The inspiration behind the project is quite curious, after a year of quarantine, I had a desire to make a trip and started to search on the online marketplace for lodging. Since traveling wasn't safe due to the pandemic, I decided to create a 3D scene to fulfill this desire and apply some techniques I wanted to practice.
For this project, I used SketchUp for modeling, V-Ray as a render engine, and Photoshop for post-production. Before going deep into details, I would like to present the workflow I applied in this project.
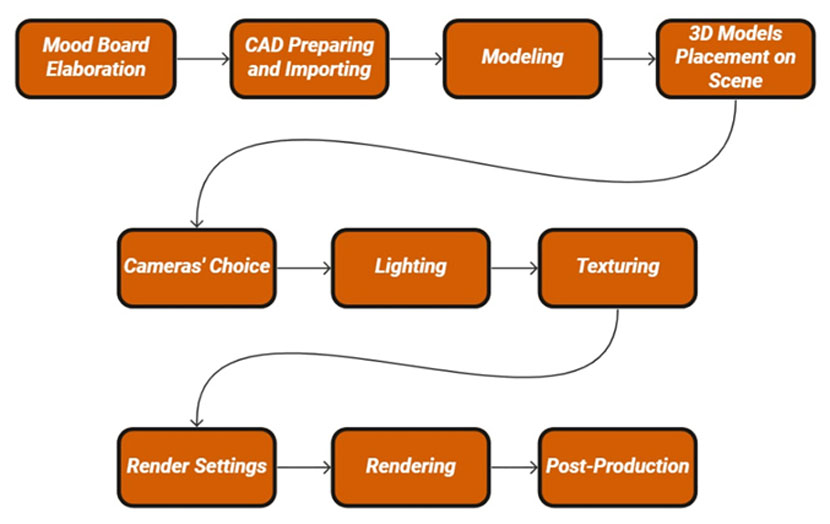 Getaway Cabin process flowchart.
Mood Board
The first step was to elaborate on the mood board for the project. This consists in a very important step since it will guide from the parameters that will be adopted to the lighting and materials that will be used. I searched for some references I wanted to follow and decided on the color palette to apply. Another important aspect is to write a brief storytelling of the project since I believe a rendering should tell a story and create an emotion and a feeling in the viewer.
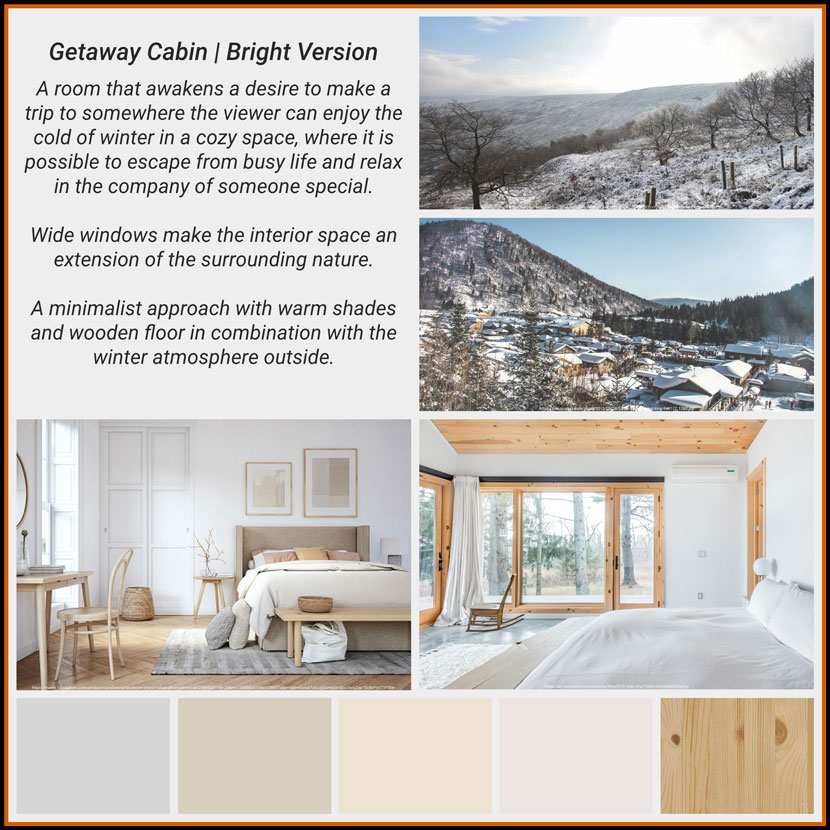 Project mood board.
CAD Preparing and Importing
I always prepare the CAD file on AutoCAD prior to importing to SketchUp. This helps to remove unnecessary elements and layers that will not be used. When the CAD file was ready, it was imported on SketchUp and put on the correct scale.
Modeling
Modeling started by creating different layers/tags to each element's nature. For this project, at first, I created the following tags: Floor, Walls, Ceiling, and Furniture. Later on, due to camera positioning, I also created the TV Set and Armchair tags.
I used line and rectangle tools to create the shape of each wall, window, and door, matching them exactly with CAD dimensions. Then, I used the extrude tool to make the walls, windows and door openings, and floor skirting. The same tools were used to model the door and the windows.
3D Models Placement on Scene
The next step was to place 3D models of furniture and to model some of them as well, like the bed headboard and the paintings. The Round Corner plugin was used to provide a better finishing and a more realistic aspect of the modeled elements. I always try to put in the scene some paintings from Brazilian artists that are available in online libraries. In this project, in order to enhance the color palette, the Rose Pallet Composition by Natália Decarle was the perfect choice.
The other models used in the scene came from my own library and from Chaos Cosmos. Building your own library, of quality models and materials, as well as PBR materials, is essential to improve and speed up the process of modeling and rendering. Besides that, the new Chaos Cosmos has a variety of models that can be used, from furniture to vegetation.
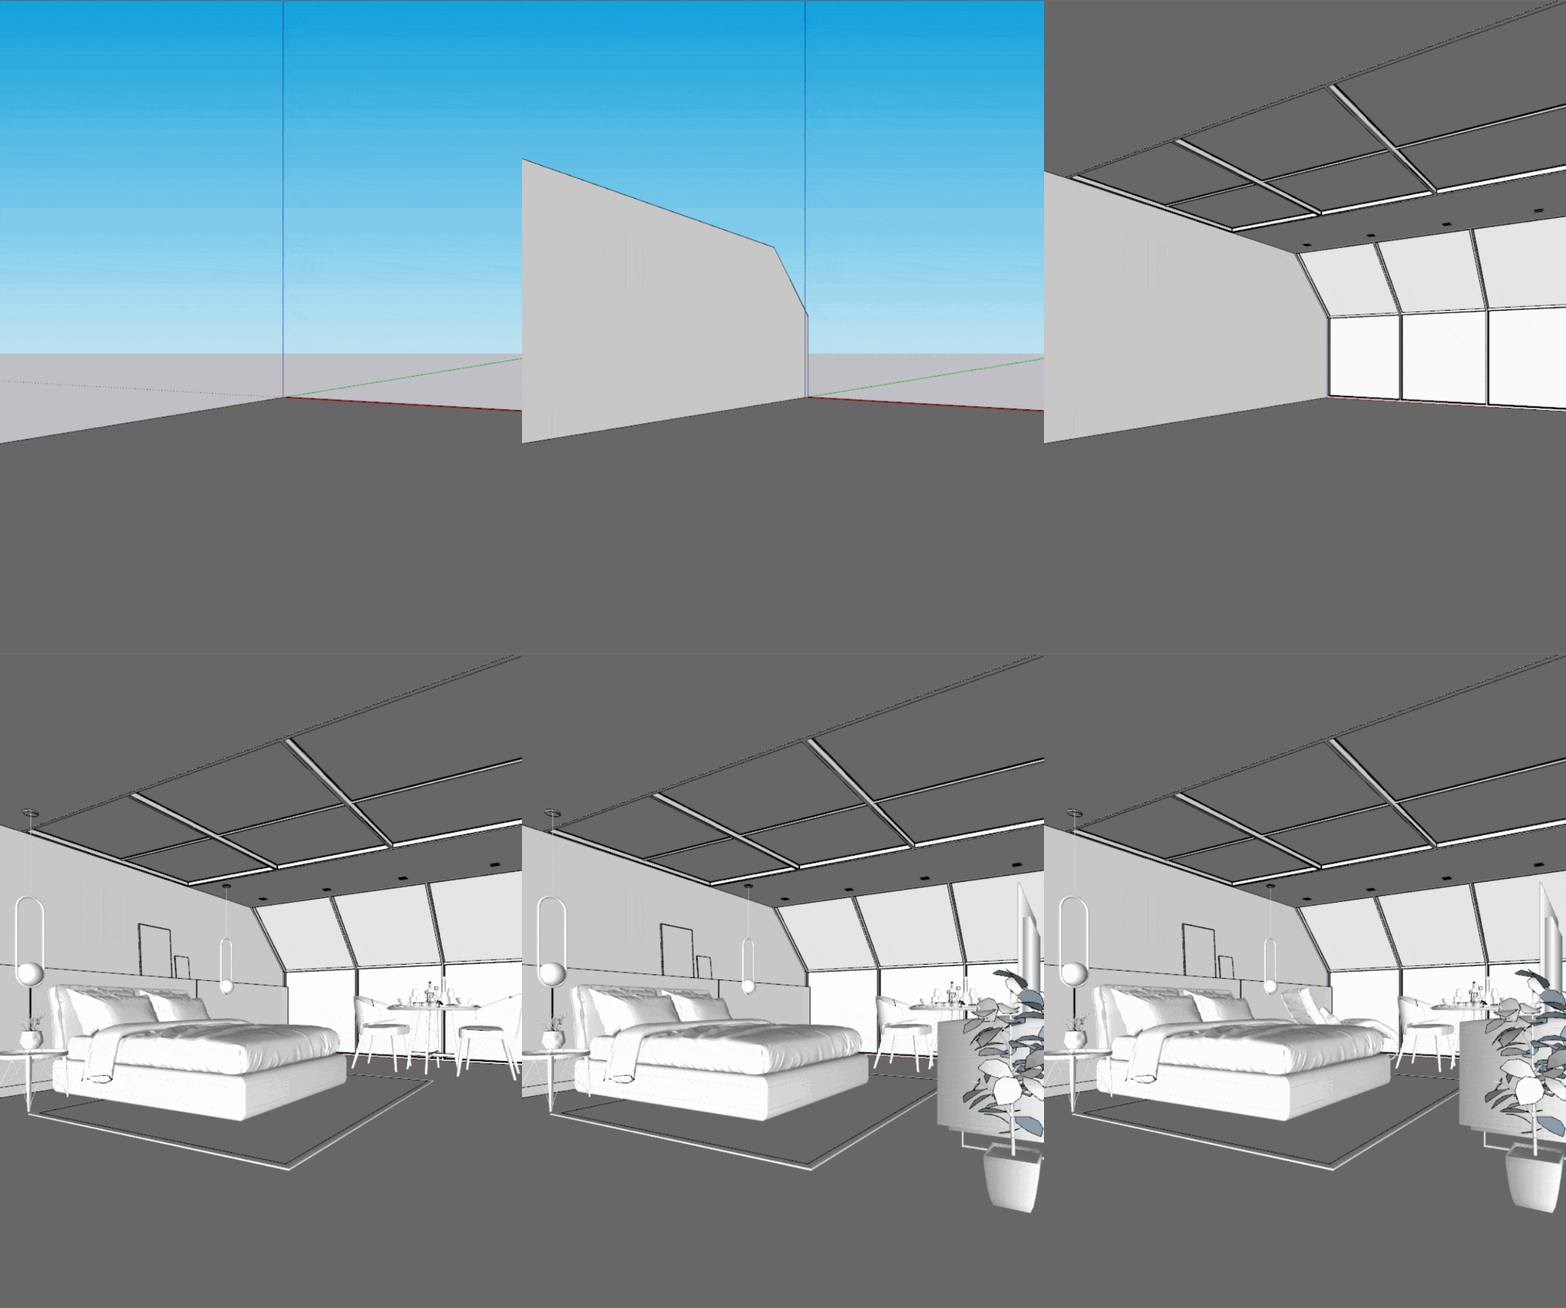 Elements grouped by tags/layers.
Cameras Choice
This is one of my favorite steps, once it allows the artist to live an immersion experience inside the scene and observe the project as a whole and also how each element of the project can be highlighted. A good camera positioning can provoke emotion and catch the attention of the viewer.
To find better angles, I used some rules of composition of photography. The rule of thirds is a powerful tool to place a camera, as well as the golden ratio. Besides that, symmetry and balance are essential rules to find good angles.
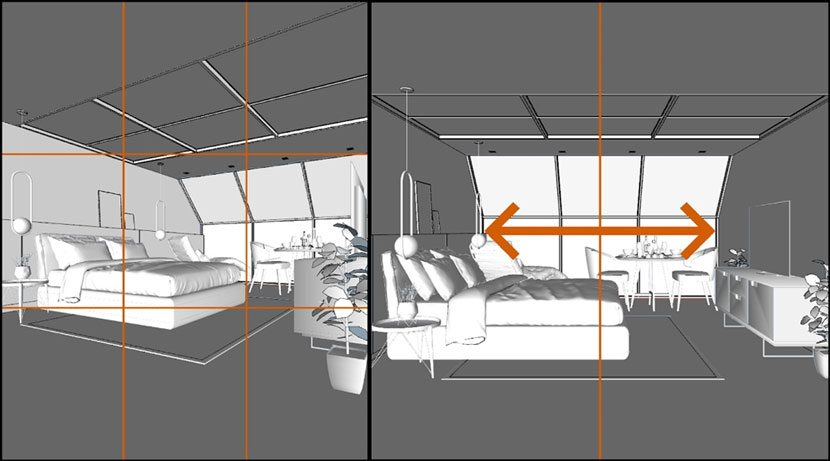 Rule of thirds and symmetry.
Lighting
Usually, to light up an interior daylight scene I use a combination of an HDRI and plane lights outside the windows. However, this project presents two wide windows, so I tried a different technique: light the cabin only using an overcast HDRI for natural exterior lighting. I think that by using HDRI files, I can input into the scene the light, shadows, and mood I desire for the final result. In this project, I also used an 8K tone-mapped jpg from another HDRI file to serve as a background. Both HDRI and tone-mapped jpg are from Poly Haven.
In the lighting process, I always use the material override tool to have a better understanding of the lighting and shadows intensity and to save time. Furthermore, usually, I reduce the Exposure Value to 10 to provide more brightness to the entire scene. Then, I apply the following steps:
1) Testing light the scene only with natural exterior lighting, due to, typically, natural lighting is the strongest light in the scene;
2) Once exterior natural lighting is all set, test the lighting turning on the interior artificial lights, light by light, such as lamps, pendants, or LEDs controlling their intensity and color.
In this project, I used a mesh light to make the hanging lights and plane lights to make the indirect LED lighting on the bed headboard, both of them with a yellow color to bring more warmness to the scene. I also used a directionality of 0,6 at the plane lights of indirect lighting.
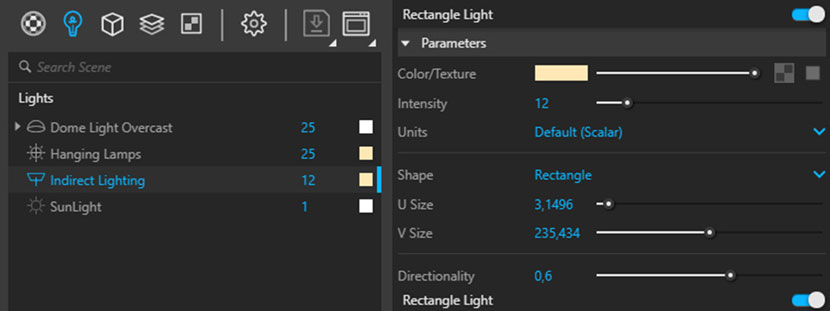 Lights list.
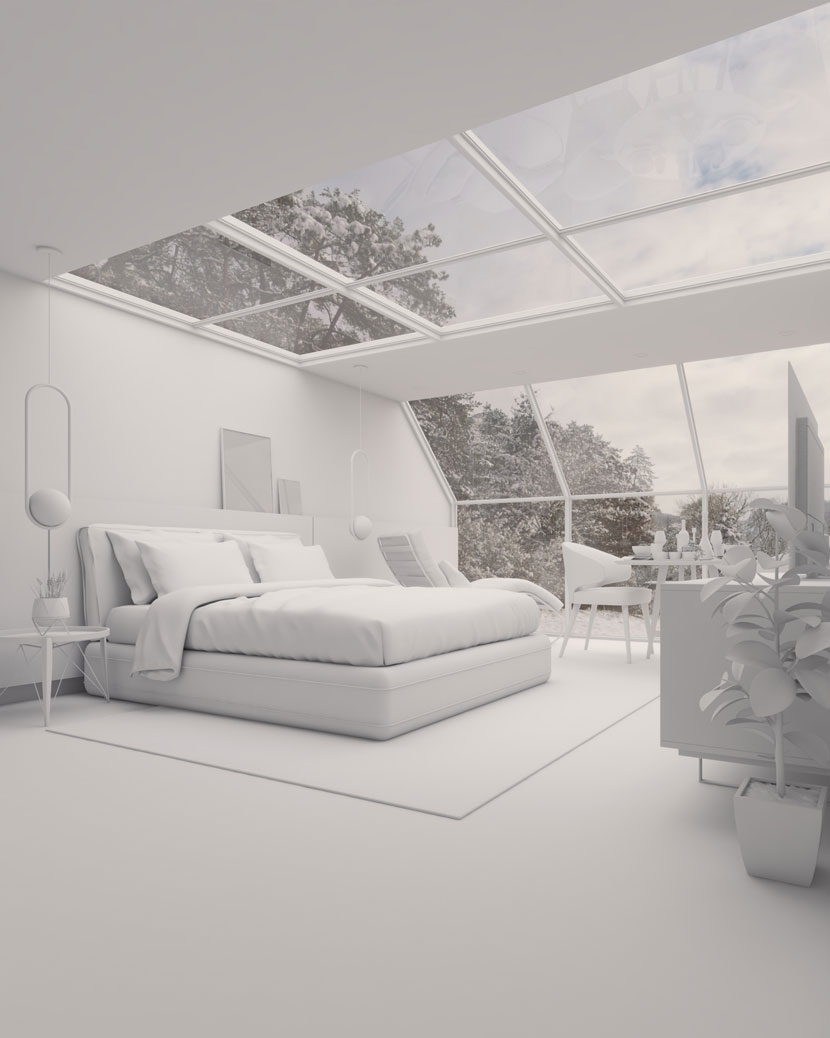 Natural lighting test.
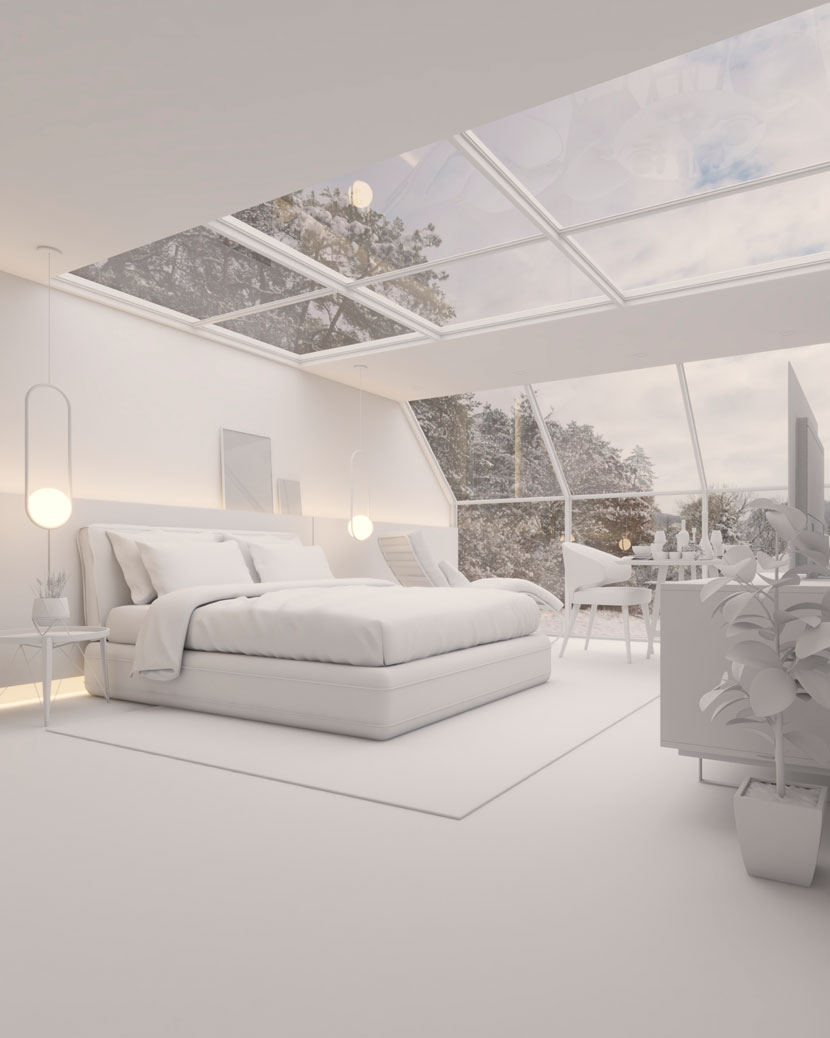 Natural and artificial lighting test.
Texturing
Most of the materials used on the scene came from the V-Ray Material Library, such as the aluminum of the windows, wood floor, wood from bed headboard, and wall painting. For these materials, I adjusted them in the intensity of bump mapping, into the bump menu, to achieve the desired result.
For bedding sheets, pillowcases and blankets, I used a fabric PBR Material from ambientCG, and, as well as for most of the fabric materials in the scene, I added a Wrap In Falloff inside the diffuse channel, using Fresnel Fallof Type and Blend Amount Multiplier Mode. By using this resource, I could get a more realistic finishing for fabric materials in the scene.
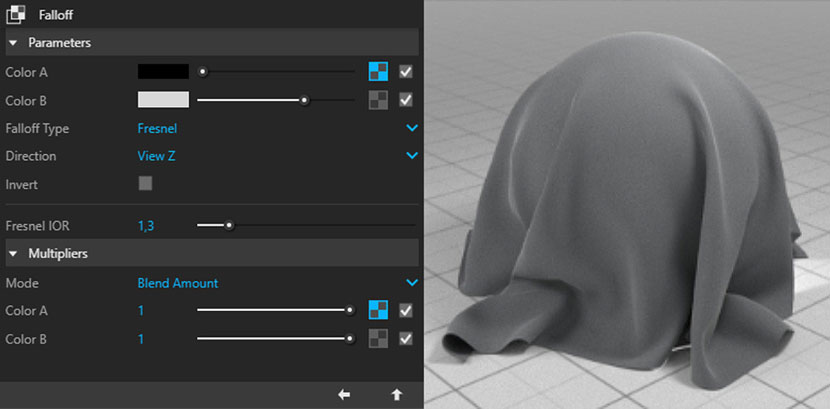 Fallof settings and render preview of the material.
Another interesting material used to present is the velvet material used in the dining chairs. It consisted of a Blend Material, using two fabric materials and a bump map to provide the velvet appearance.
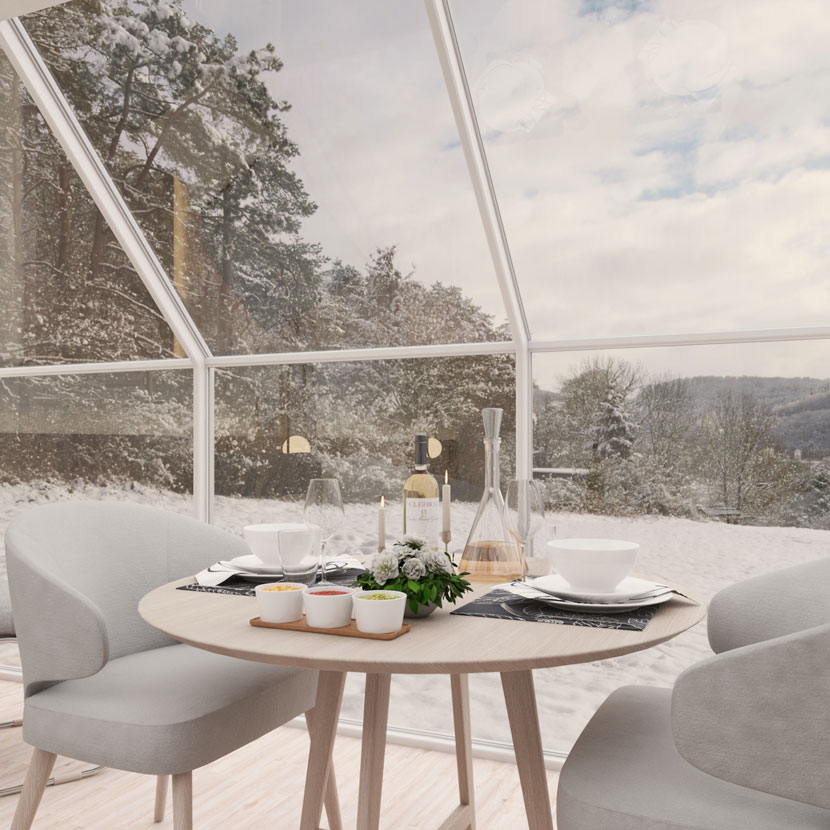 Testing blend material in the scene.
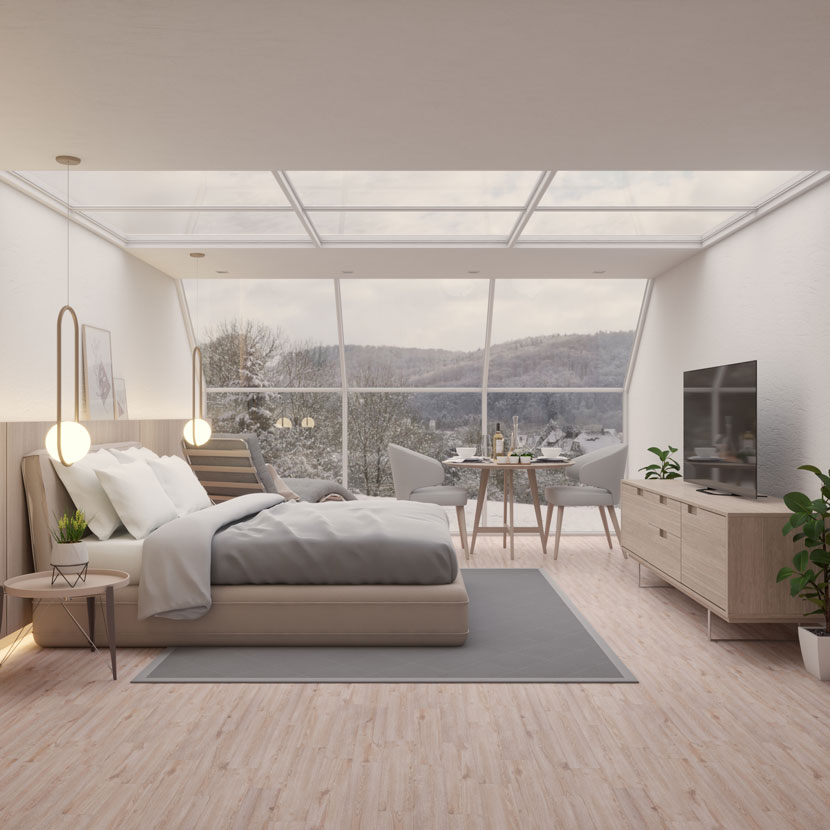 Test rendering with materials.
Render Settings
Both in the testing renderings and in the final renderings, I used irradiance map as primary rays and light cache as secondary rays. In order to save time, during the testing phase I use higher values of noise limit and sample size and reduce values of max subdivisions in the quality menu and subdivisions in the light cache menu. These parameters provide good quality for the testing phase.
For final rendering, I used noise limit of 0,01 and max subdivisions of 12, under the quality menu. In the global illumination menu, under irradiance map, I used a min rate of -3, a max rate of -1, subdivisions and interpolation of 50. Under light cache, a value of 1200 for subdivisions and a value of 0,01 for sample size. I also activated the ambient occlusion with a radius of 8 and an occlusion amount of 0,4. To get rid of noise, I turned on the denoiser using the preset mild. As render elements to use in the post-production, I used light mix, material ID color, raw light, raw reflection, and raw total lighting. All of them with the denoise slot checked. In the V-Ray Frame Buffer, I used the layers of white balance to increase de temperature of the scene, exposure to reduce both exposure and highlight burn and increase contrast a little bit and lens effect to control glare and bloom.
 Render settings.
 V-Ray frame buffer settings.
Rendering
Once finished the render settings, the next step is to render all the scenes. In order to save time, I used the RebusFarm render service. Every time I render a project I render at RebusFarm, I'm impressed by the intuitive process, speed, and the usual kindness from the RebusFarm team. If you are a SketchUp and V-Ray user, to submit the file to RebusFarm, all you have to do is to export the V-Ray scene file. Then, right click the RebusDrop app at the Windows taskbar, select import standalone and click the option .vrscene file. A new window is opened, then just select the file, name the output file, make sure to put all search paths, select V-Ray version and that's it, you're all set. Now, RebusFarm will render the scene and warn you once the render is finished.
Post-production
After all, I brought my renderings to Photoshop to control lighting and shadow regions through raw total light and raw light elements and adjust reflections through raw reflection elements. Finally, I added a new adjustment layer of brightness and contrast, to increase just a bit the brightness and contrast of the effects result layer.

Thank you so much for reading my "Making-of", I hope you have found useful information. I really appreciate your attention!
RebusFarm team, I am very grateful for having me and for giving me the opportunity to share my knowledge. Thank you as well for all the support you have given to the 3D community.
If you have any questions, do not hesitate to reach me through the socials below. I wish you all the best!
Thank you, Leonardo, for sharing your awesome work and your process with our Rebus community. Check out more of Leonardo's work on his different channels:
Want to share your work with our community too?
Contact us at This email address is being protected from spambots. You need JavaScript enabled to view it.and tell us about your favorite project.
>> Read more articles on our blog
