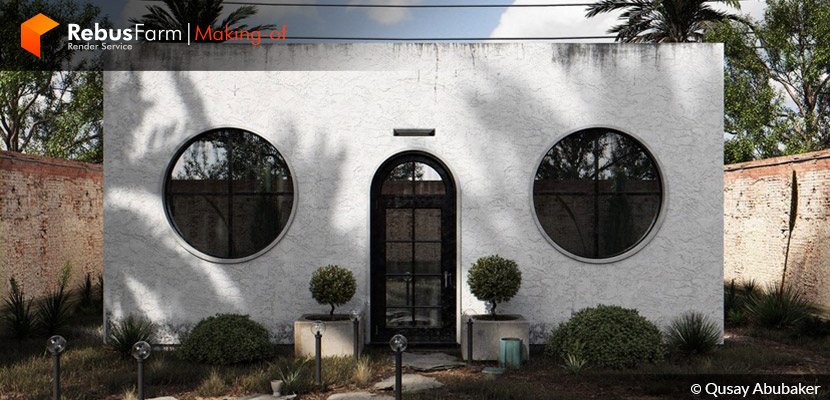
Experimenting during our free time is essential, while it does not matter if we succeed or fail. We can always learn something through the 3D training process. Be ambitious in applying your goals but mainly try to learn how to be patient. 3D artist, Qusay Abubaker, kindly accepted to give us a behind-the-scenes making-of article reciting not only the creative process but also a short part of his story.
About me.
Hello everyone, my name is Qusay Abubaker, a Palestinian 3D artist & Interior designer. I started my journey in 2012 in college during my studies in interior design and as the years were passing by, my interest in 3D was developing step by step.
It was actually started as a humble journey with some basic knowledge of 3DS Max and V-Ray. I always look forward to the best artists worldwide and I find this process really helpful as I love criticism and the thrill of developing myself to be among the best artists in the world, hopefully someday. As I developed my 3D rendering skills, I started shifting my interest from architecture and interior design visualization to more cinematic / movie-like scenes. To be honest, I had way more fun doing this type of work and it was a major reason for my improvement. I jumped back and forth from my comfort zone, and never settled in one area, but also it left me with no specialty and I think it threw me towards being a 3d generalist.
Now, after 6 years of practicing and taking courses, with the help of amazing people in the 3D ArchViz community, I am happy with the level I have achieved. So I want to thank Rebusfarm Team for this opportunity, and I want to thank Vasilis Koutlis, the founder of VWArtclub, who helped me a lot during the journey of learning and never stopped helping me until this day. Ciro Sannino for the amazing 5SRW Course that helped me a lot when I first started, Rami Shraim for his amazing support and knowledge, Nikos Nikolopoulos the founder Of Creative Lighting for the amazing courses and live support.
Now let's dig into the making-of article!
About the project.
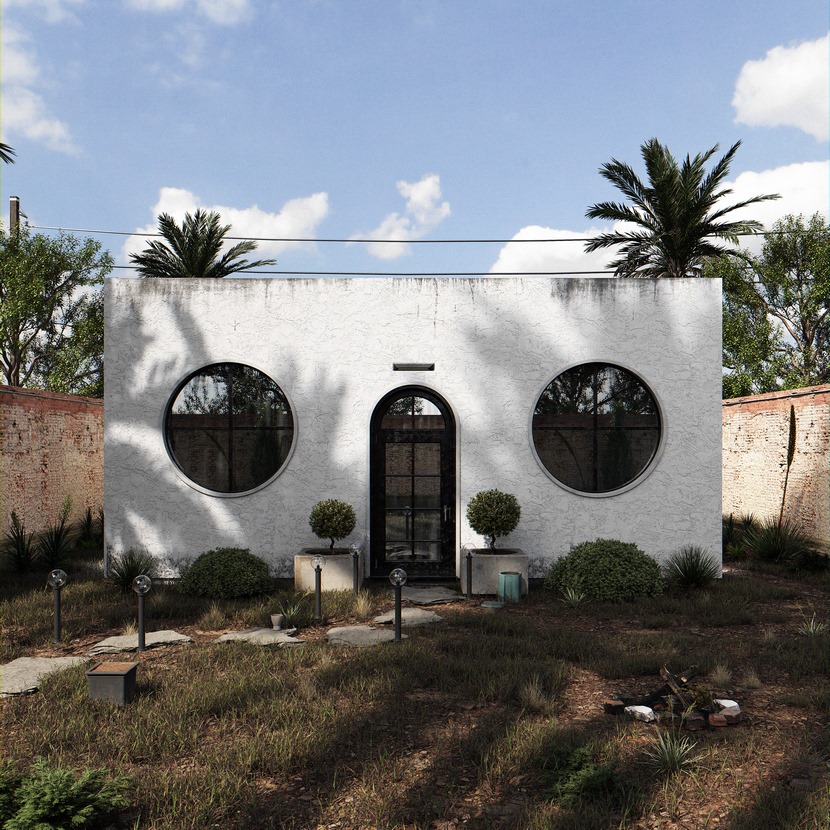
This project was inspired by the Plaster Fun House project, the work of Sans-arc Studio. I have seen the photographs of this beautiful and cozy small house in multiple places over the internet, but I didn’t want to Photo-Copy the project in terms of modeling and details. I liked the first mood of the place and I tried to create my own scenario.
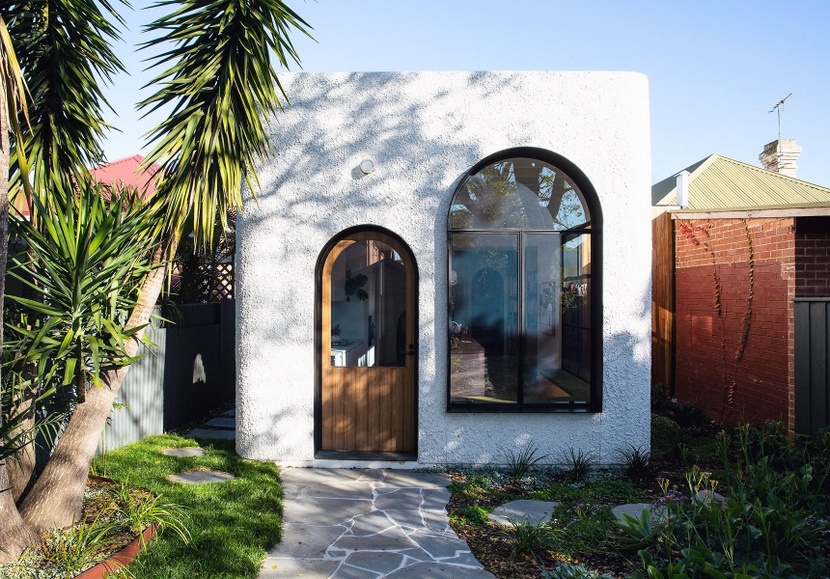 Plaster Fun House by Sans-arc Studio. Photographer: Thomas McCammon
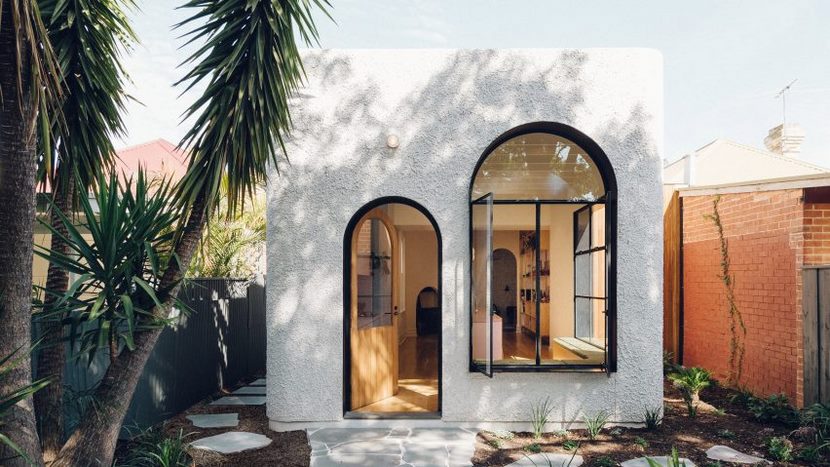 Plaster Fun House by Sans-arc Studio. Photographer: Thomas McCammon
Software used.
The project was done using 3DS Max for modeling part of the scene, Chaos Cosmos for 3D assets and HDRI, Quixel Megascans for some materials and grass scattering assets using chaos scatter, Phoenix FD for the small fire and smoke in the scene, DebrisMaker 2 to generate the stones, and of course Adobe Photoshop for post-production.
Check below, a very simple but useful official video tutorial related to the way you can scatter 3D assets.
Modeling & Scene assets.
I started creating a simple model of this small house and gathered the main assets for the background as big trees, palm trees, and power lines models. Then I searched and looked for the best assets to use in the foreground. I finally used Chaos Cosmos and Quixel Megascans for most of the assets.
It’s really important to focus on the assets and materials of the close-to-camera objects as they are the most visible, and the most focused on. So, we carefully choose the best modeled and textured assets available to achieve the best possible quality.
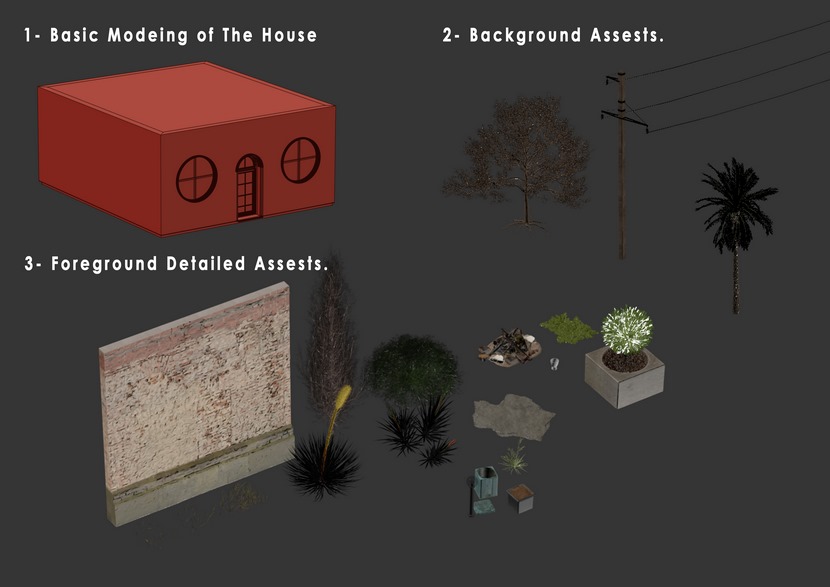
A look into details.
One of the main keys to getting a realistic result is the randomization of the objects. That means random sizes, positions, and colors, but we have to also randomize them in harmony, just like it happens in real life. The closer we are to nature's behavior, the more realistic results we get.
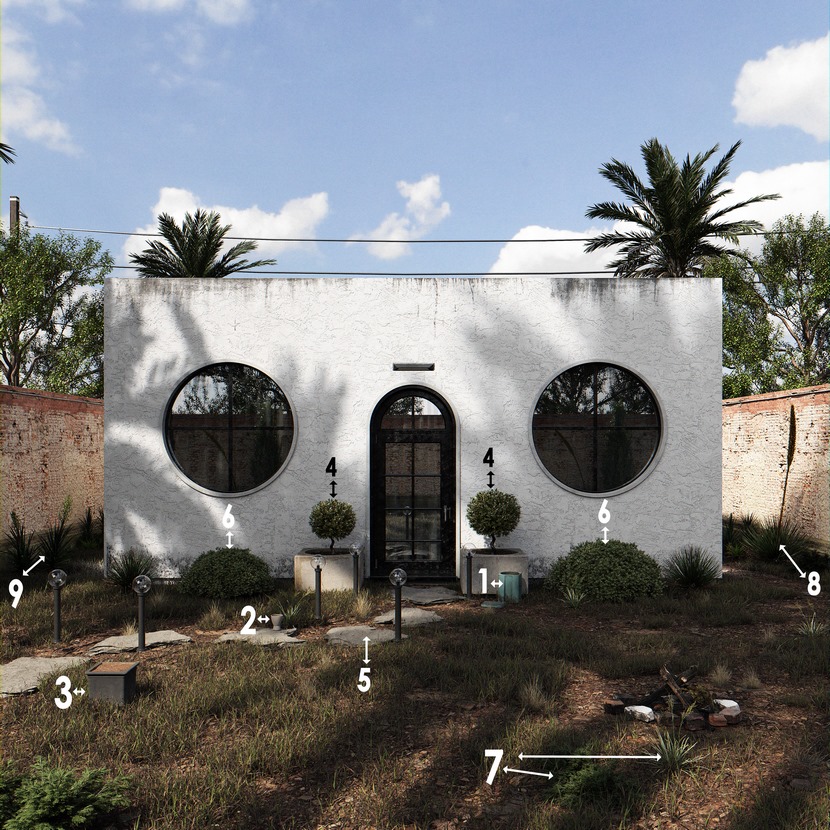
Now, as you can see in the image above, there are multiple numbers.
1, 2, 3. we can see some random objects that were put in the scene by "human hands". We have three different types of objects, and they have no similarities in color, size, placement, or rotation. This is one of the first tips that we can do to represent a nice and realistic result.
4. We have the same object but in different sizes and rotations. In this way, we can achieve some type of randomization using exactly the same object.
5. This was made by decreasing makers too, so we randomly generate the stone steps.
6. It's the same scenario as number 4, random size, and random rotation.
7. As you can see there are some random assets of plants.
8, 9. We can "break" the symmetry of the image by having two different plants with two different sizes with different rotations.
For the rest image, the background trees also have some different rotations and different sizes.
Lighting & Moods.
Daylight Scene.
The daylight scene has one and only light source which is the HDRI map, representing the environmental lighting. It was selected from the Chaos Cosmos browser and the key is to find some sort of balance between light and shadows in order to make the scene as realistic as possible. We don't necessarily need to have many sources of light to achieve realism. Sometimes, one light can perfectly do the job.
Night / Sunset Scene.
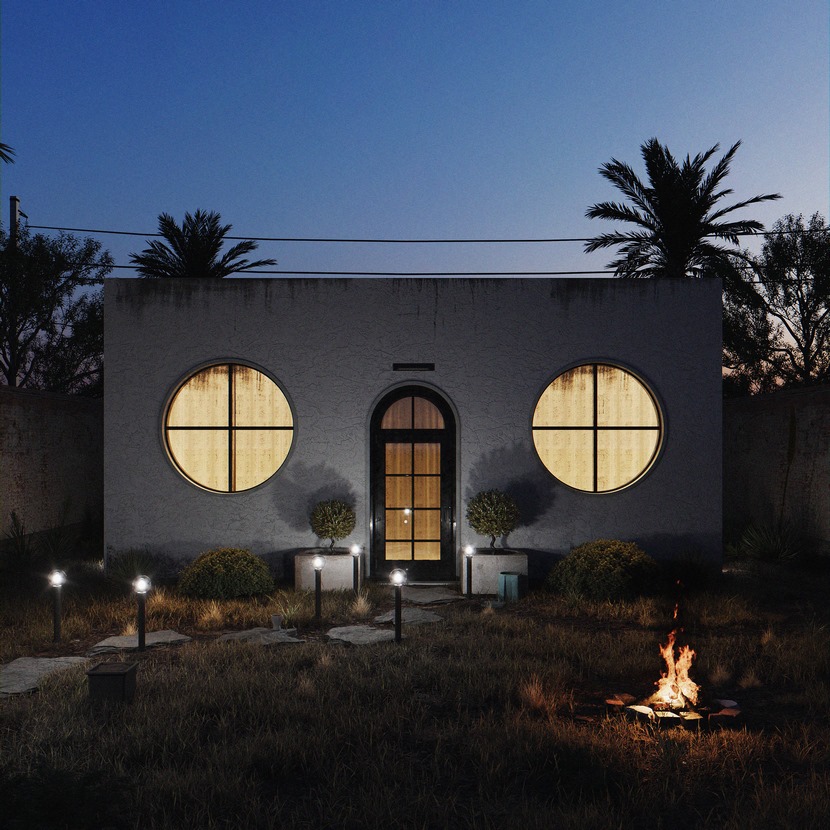
In the case of the night scene, I used a sunset HDRI, and I tweaked it a little bit to achieve the results that I had in mind. We obviously have multiple lighting sources to handle now, a mix of warm and cold lights.
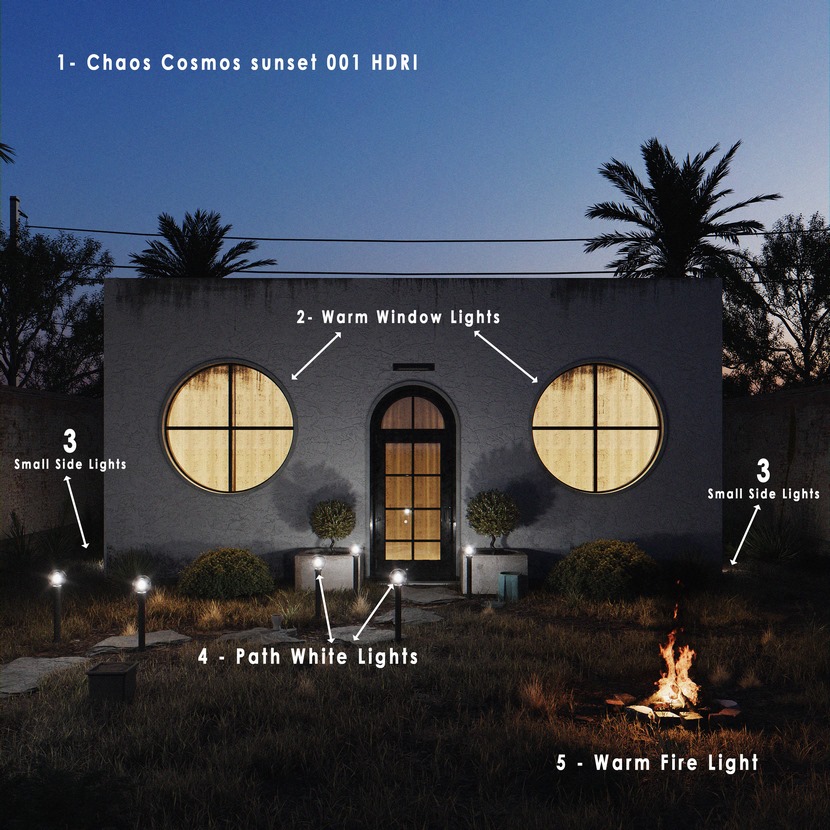
Colour temperature is something very important. The color we give to each light is a palette we have to combine for a beautiful output. Take a look at this short and informative video tutorial below to understand what I'm talking about.
Additional moods.
For the rest three moods, I used a different sunset HDRI, and I played with Corona Light Mix to achieve the desired mood and feeling. I think it's just a matter of taste in the way we play with this great and revolutionary tool as we can achieve whatever mood we like in a couple of minutes and without the need of rendering our scene.
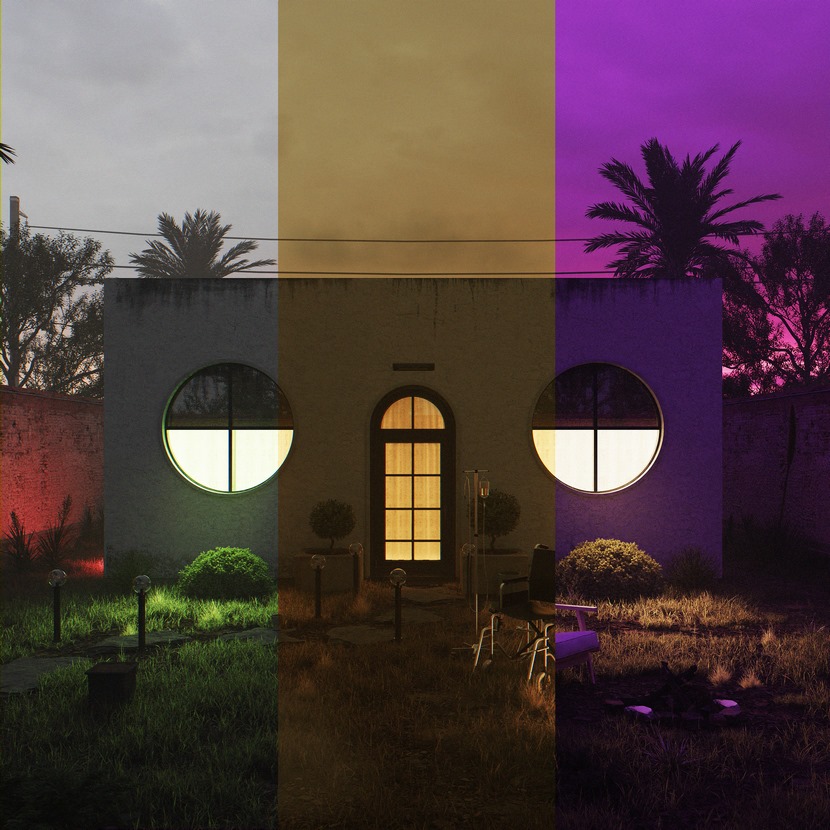
Below are the separated images for the three different moods.
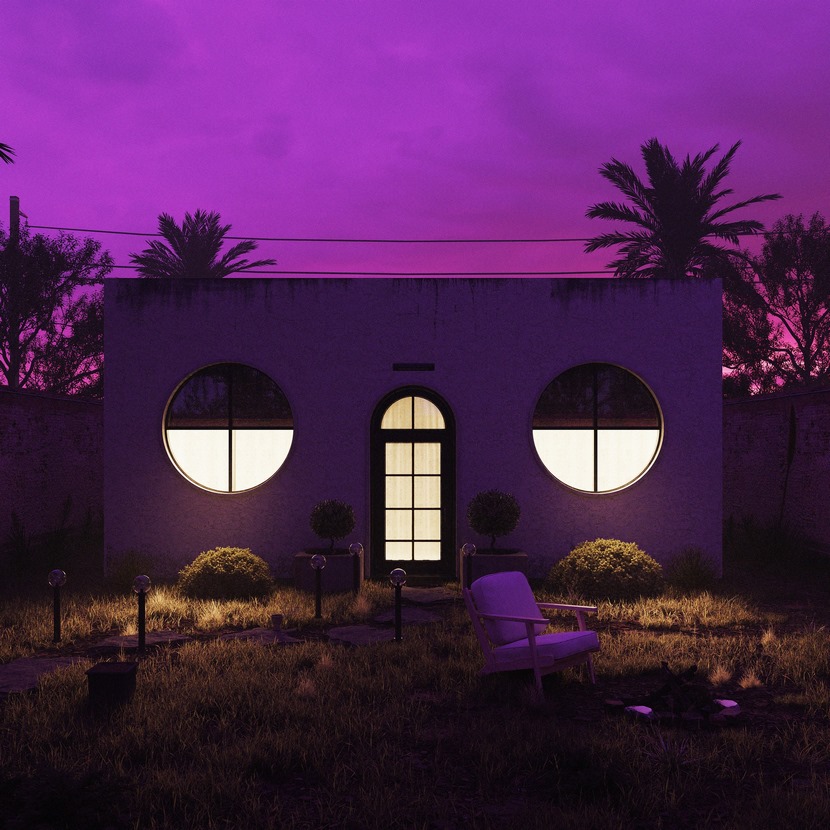
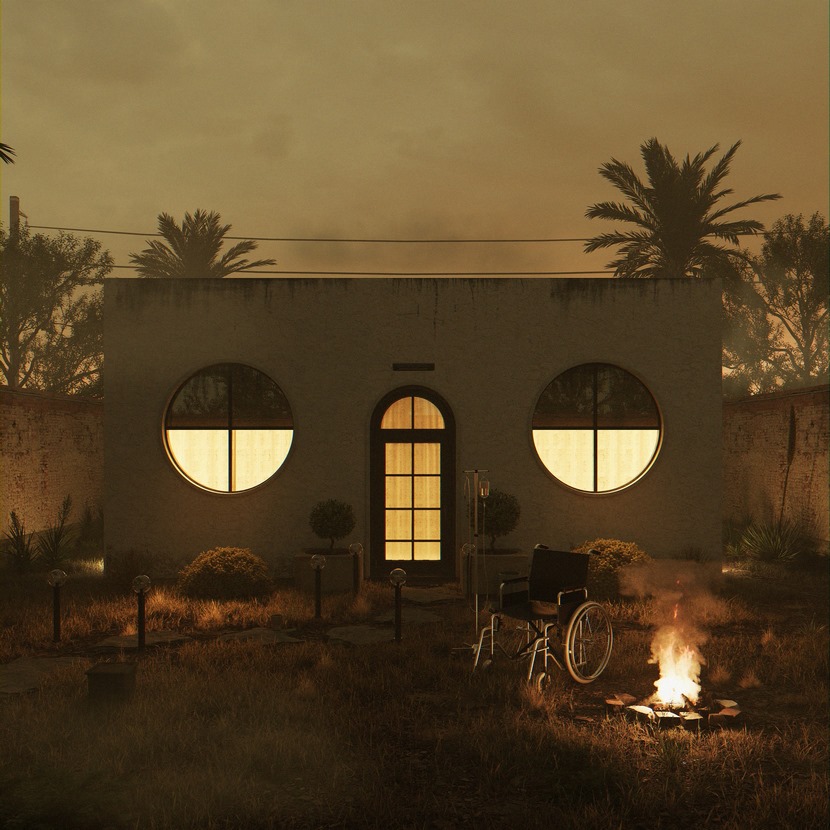
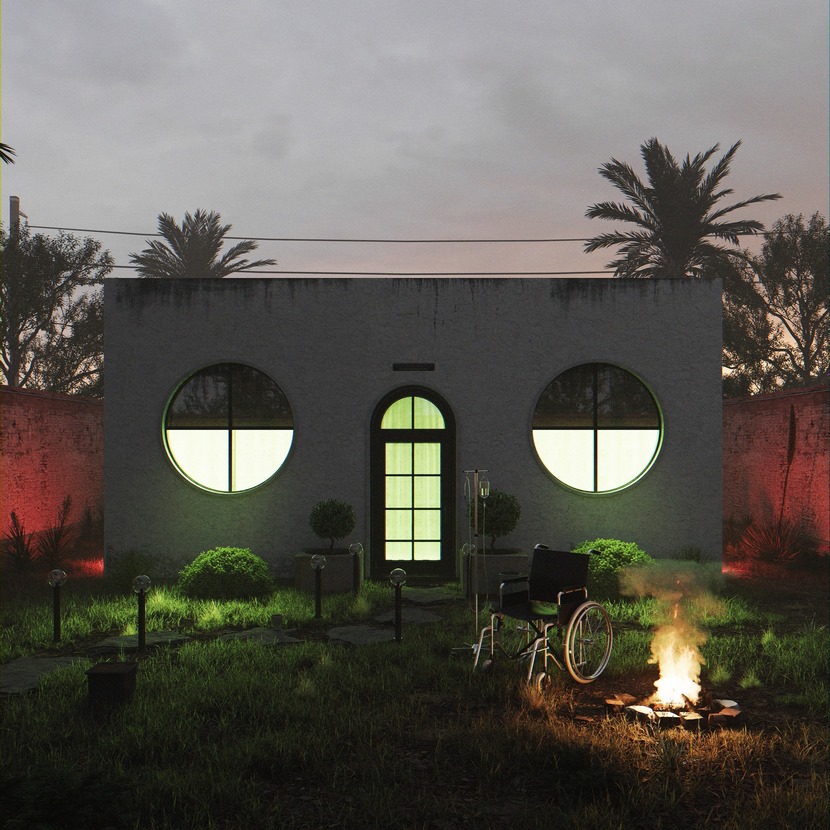
Extra details.
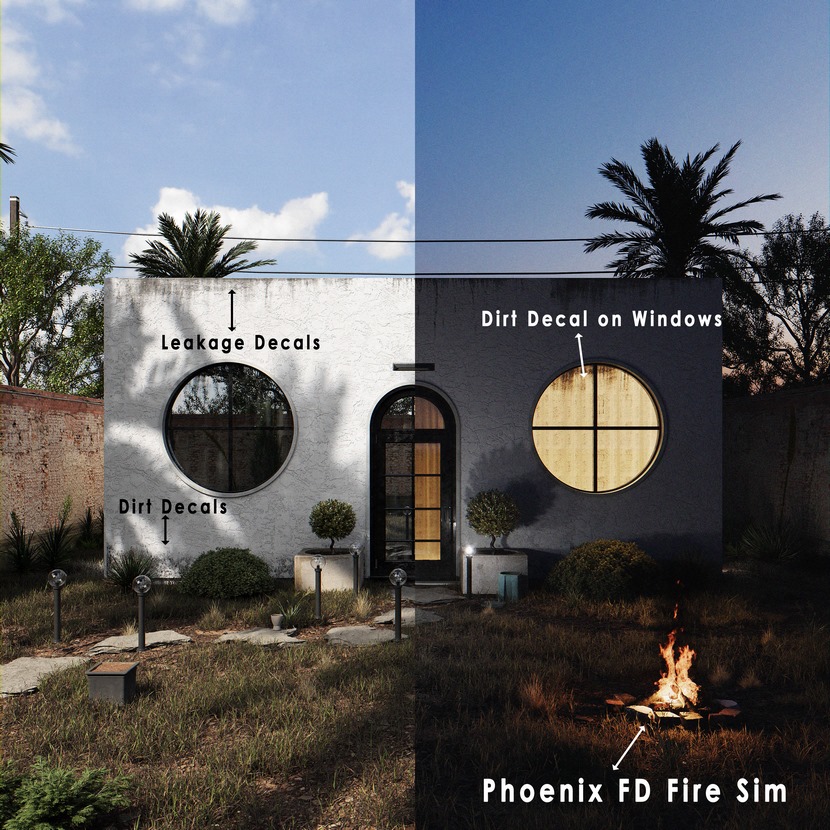
Corona 8 Decals.
I have also used the new feature in corona 8 called "Corona Decals". We can easily import decals from Quixel Megascan's bridge and use them in our scene to add realism to our scene.
Phoenix FD Fire Sim:
I have also used the Phoenix FD fire simulator to simulate the fire effect as well as the smoke. it's really easy to use it. Just click and create the sim, choose the object, and activate the simulation to get the final results.
Summary.
As you see in this making-of article, these days, it is not hard to achieve a really good result with different moods from a single file. You just need to work in an organized and step-by-step way, focusing on high-quality assets and textures. It is also important to make sure that you spend your time giving your eyes some practice by always looking at unrealistic images or real-life photography, so your eyes can easily notice wrong textures, bad modeled assets, and details that can improve your effort.
I hope this breakdown has helped you somehow. It's my first making-of article and I enjoyed the process but if there is something you need to know and I didn't cover it, please do not hesitate to contact me whenever you want through my social media channels below.
Have a great day and keep rendering!
Want to share your work with our community too?
Contact us at This email address is being protected from spambots. You need JavaScript enabled to view it.and tell us about your favorite project.
>> Read more articles on our blog
Get started with your own renderings
