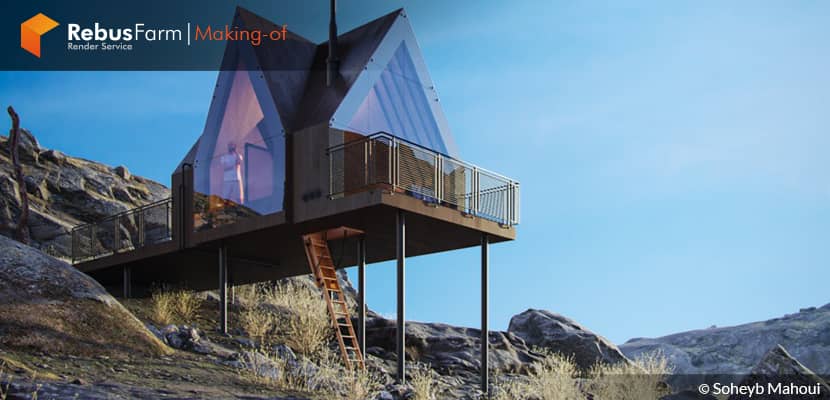
It's something really great to see artists who thirst to get knowledge, improve themselves and reach a higher level year by year. It's even greater to see them, after getting this knowledge, sharing it with the rest community. Soheyb Mahoui, an architect and 3D artist from Algeria, is sharing his workflow and some useful tips on this beautiful personal project. Enjoy!
About me.
Hello, 3D community!
I'm Soheyb Mahoui from Algeria, an architect, who graduated in 2011. I learned Archviz as a secondary skill to help visualize my own projects. After a few years of being an architect, I noticed that my real passion is CGI.
At first, the biggest challenge for me was getting approval for a project I published in the VWArtclub Facebook Group. It was three years ago when I wrote this post and this comment by the admins of the group was the biggest turning point in my career as a 3D artist. This is where the real challenge begins.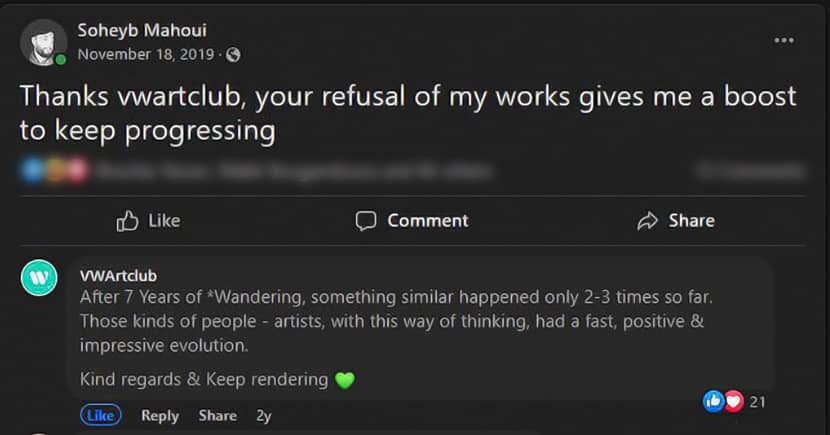
I would also like to mention that I'm very happy and honored with this invitation and I would like to thank the "Rebusfarm team" for organizing such initiatives. I also thank VWArtclub for its constant support of artists around the world, especially beginners. Special thanks to the artist "Rami Shraim", the most helpful person in my career. I would also like to thank the teacher "Ander Alencar" for his amazing course "Oficina3D" which helped me a lot to reach this level.
Software Used.
Everything was done with 3DS Max, Corona, Quixel, ForestPack Pro & Photoshop.
About The Project.
"Tundra Cabin '' is a personal project and the main idea behind it is to make a mobile small wooden cabin for camping that can be trucked to all different places around the world. The first camping place I thought of was the Tundra region which is the coldest biome existing on Earth. More about tundra biomes HERE.
Below, is an interesting video describing this naturally beautiful region:
References.
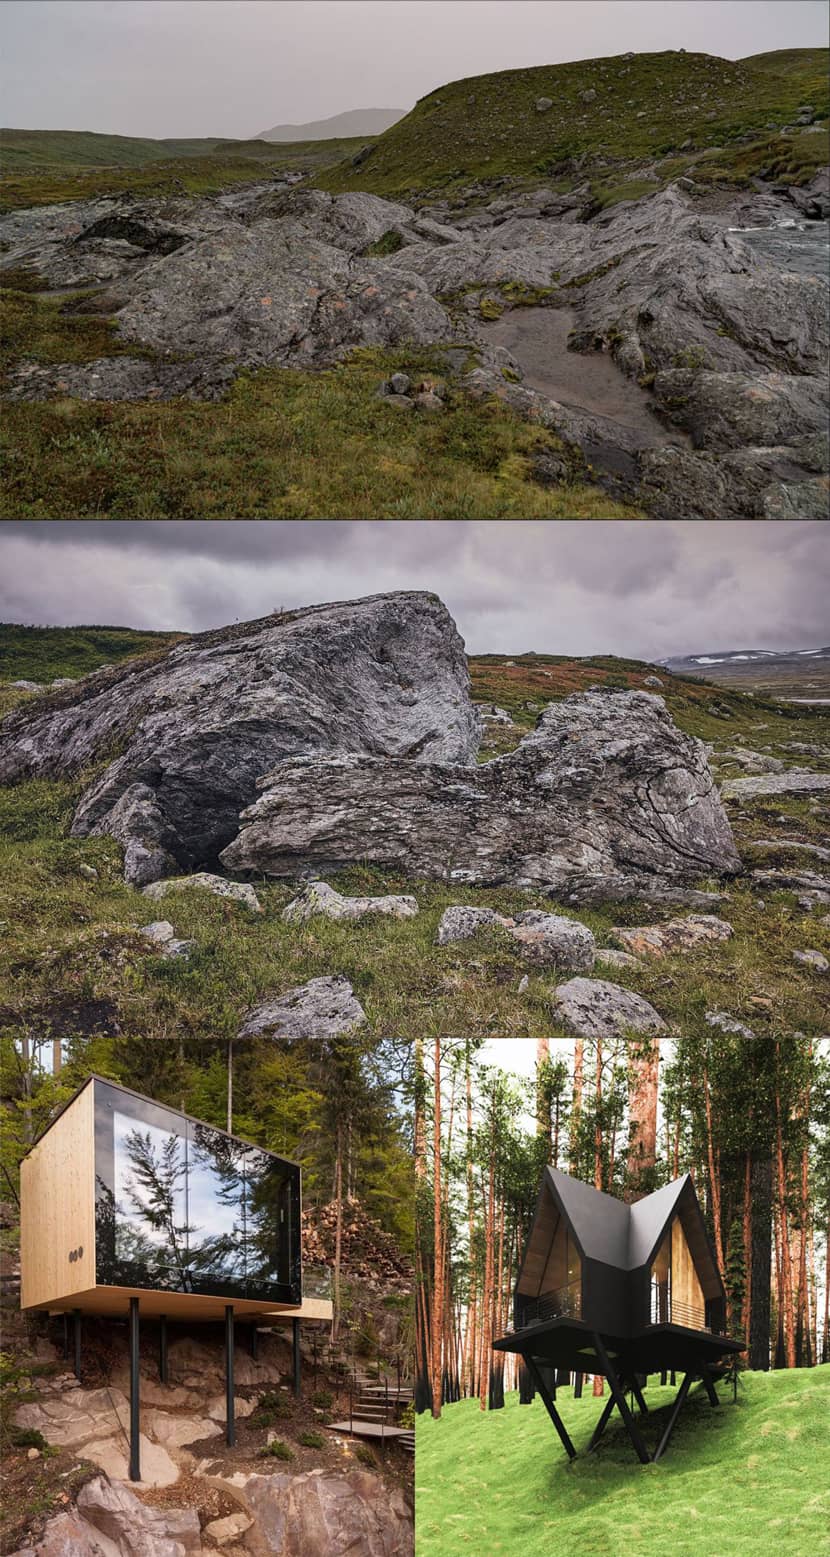
The first thing I did in this project, was to collect some references related to the environment such as the type of rocks, soil, and plants to be in tune with reality.
Modeling.
After I obtained some appropriate references, I drew a quick sketch of the general shape and started modeling with a standard box and some modifications with very simple commands.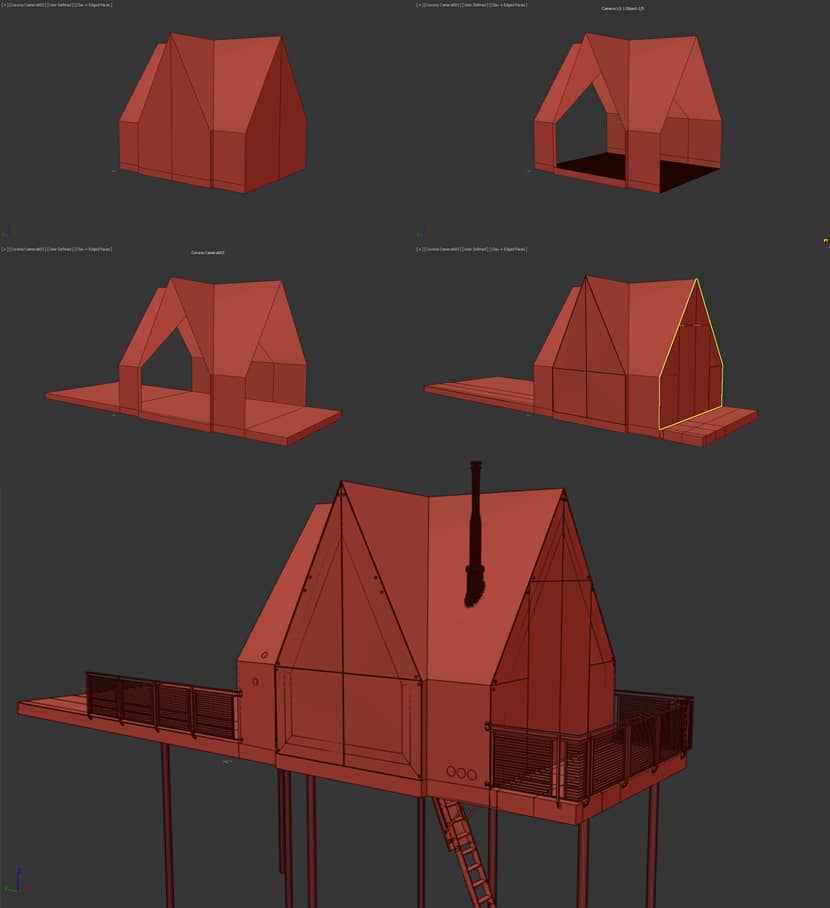
As for the terrain, I created a plan with some divisions, using Edit poly and Tessellate commands, I increased the number of faces every time I approached the project and the camera. At the same time, I modified the terrain with the push/pull command, from the freeform list, until I get the best topology without raising the number of polygons over the scene. I find it a very useful way to work on wide terrains.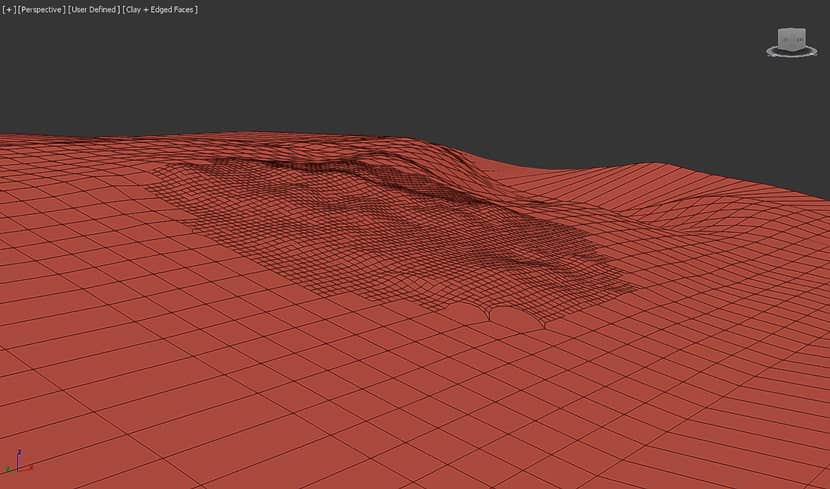
Composition.
After getting a basic look at the project, I moved directly to the composition step. I placed the camera lower than the main object (Cabin) to enhance the sense of inclined terrain. I also put the cabin in the left third, oriented towards the right, to represent the open view on the opposite side of the facade. Additionally, by using the project axis intersecting with the terrain axis, I achieved this goal.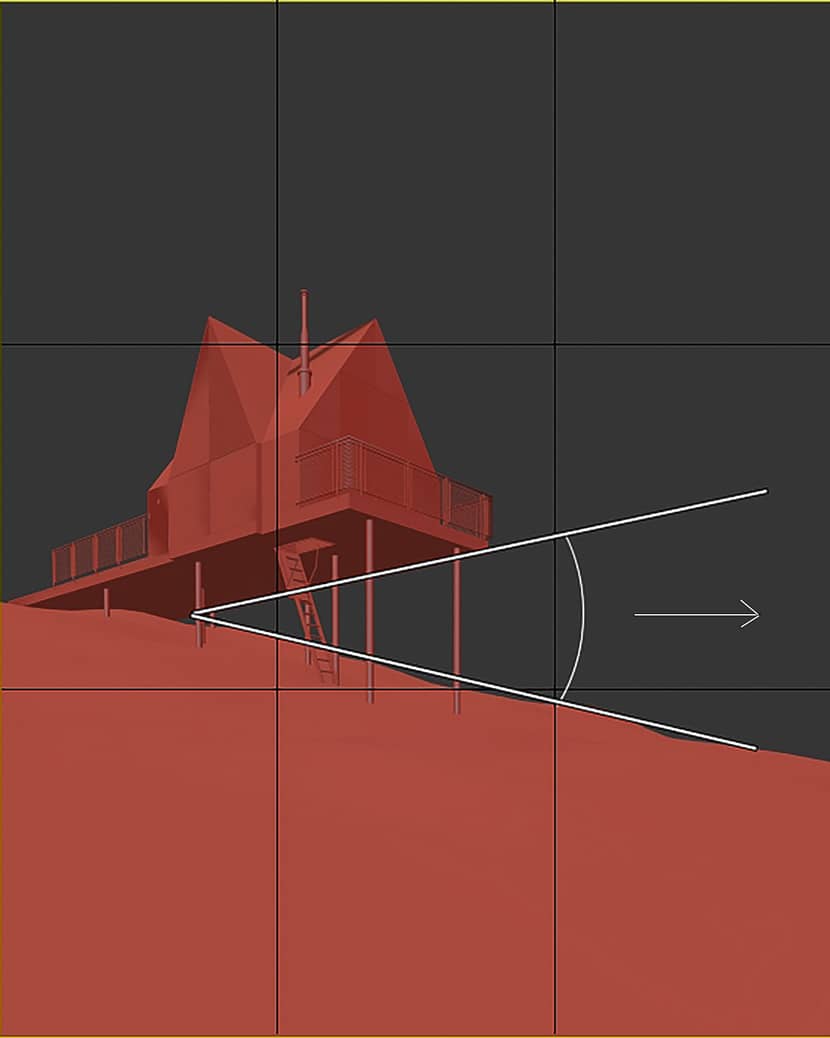
Materials.
The whole project contains only 5 materials:
- Glass material with no maps.
- Metal material with only coronaRoundEdges in the bump map.
- 2 simple wooden materials, one for the external part and the other for the internal.
- And for the terrain: one ready-made material from Quixel.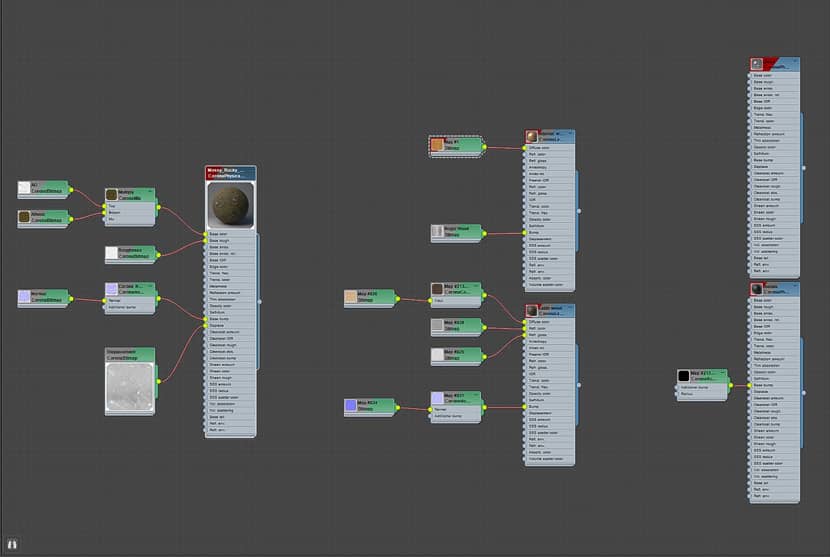
CLICK TO ENLARGE THE IMAGE.
Assets.
This is also a very simple step:
- Assets from Quixel without any modifications.
- The person from Chaos Cosmos.
- The distributed greenery was also from Quixel using ForestPack Pro.
USEFUL TIP:
In order to avoid the intersecting of the plants with the rocks, I followed a useful tip that can help in many projects: I instanced the terrain and the rocks and added them both as Union operands to boolean compound objects. After adding an edit spline modifier, the splines will be automatically created where the two surfaces intersect. In the Forest Pack Pro add the spline to the area list and change the mode to exclude. 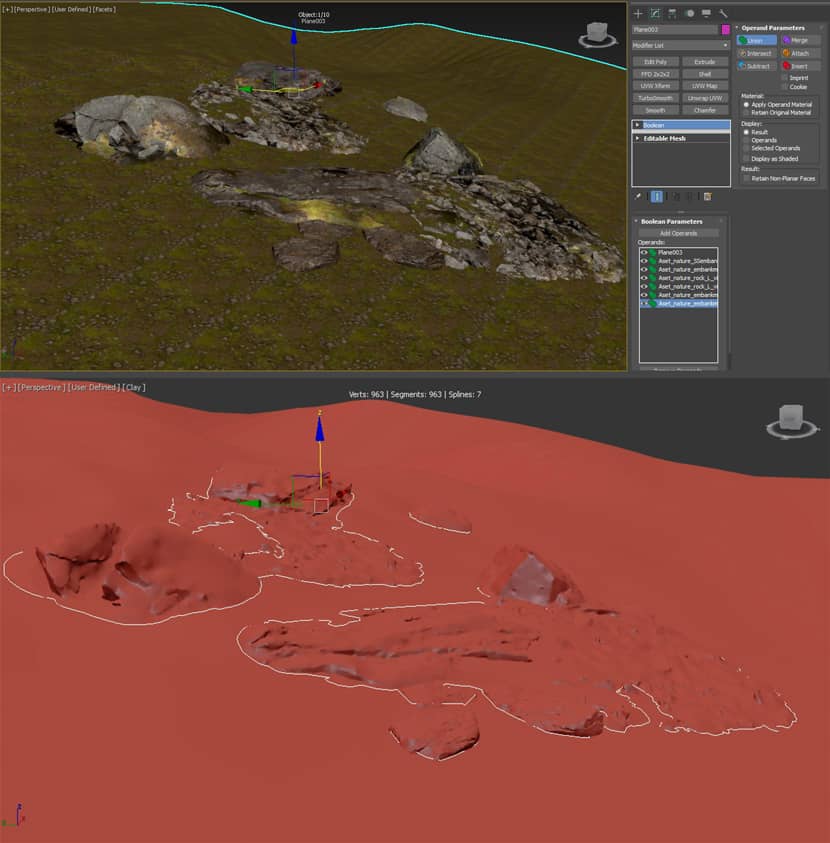
Lighting.
For the main lighting, I used two light sources one is a saturated Hdri with a blue sky from Polyhaven HDRIs and the other is a desaturated corona sky to bring more light into the scene. Also, I activated the volume effect in the corona sky settings to get an atmospheric perspective effect and put them in the multimap light mix in the render setup.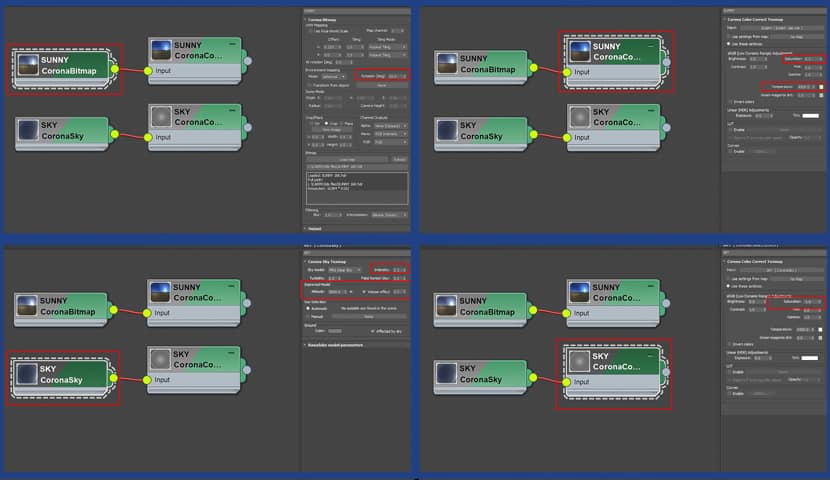
CLICK TO ENLARGE THE IMAGE.
Some additional lights, a sphere light inside the cabin to give me a warm and cozy feeling, and some rectangle lights on the opposite side of every metallic element to get some highlights and also more depth in the image.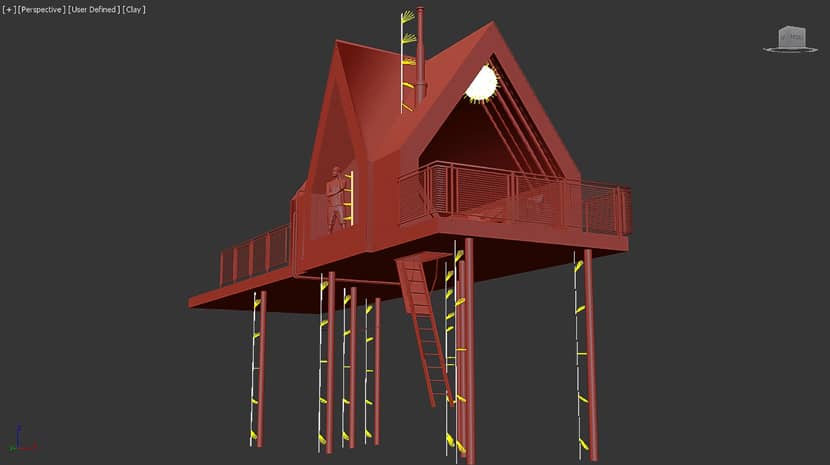
Render Settings.
As it usually happens with Corona Renderer nothing special, but here they are: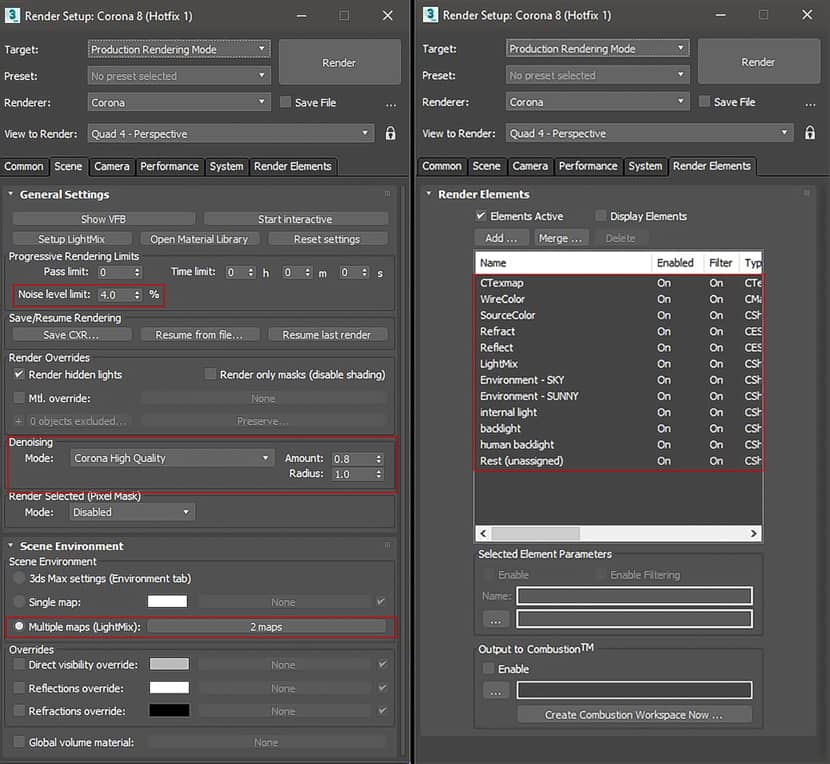
Post-Production.
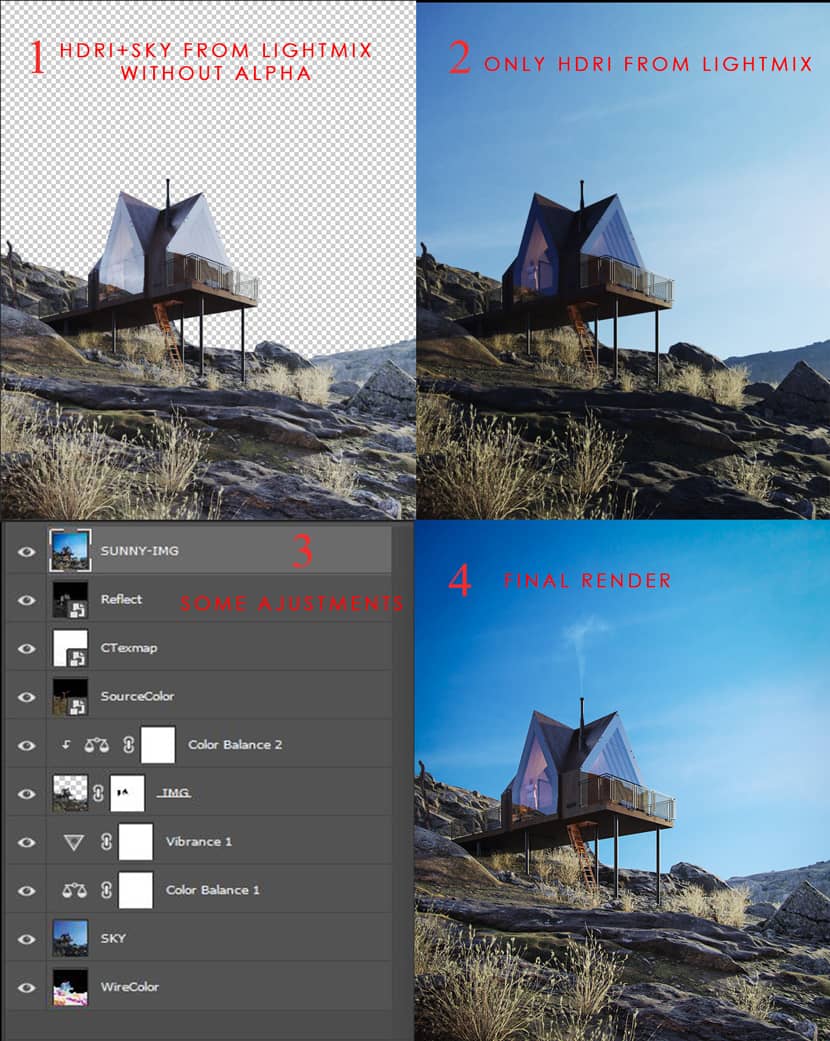
All the post-production process is in the attached picture, and here we are with the final result.
Conclusion.
Thanks for your time and effort to read my article. I hope you enjoyed my making-of and found it useful.
Have a great day,
Soheyb Mahoui.
Check more of Soheyb's work on these channels:
Want to share your work with our community too?
Contact us at This email address is being protected from spambots. You need JavaScript enabled to view it. and tell us about your favorite project.
Get started with your own renderings
