
Welcome to our most recent RebusArt Feature, which features the gifted Fernando Muhongo, the founder of 3D Studio Representa and a 3D artist from Angola. Fernando, who has worked in architectural visualization for more than eight years, creates images that are emotionally authentic and feel dramatic by combining light, texture, and arrangement. Come along as we examine his artistic approach, creative journey, and the sources of inspiration for his moving piece, "Living Room".
Introduction.
Please share a bit about yourself and your background as a 3D artist. Was there a particular moment, artwork, or artist that inspired you to dive into 3D art?
Hello,
I'm Fernando Muhongo, a 3D artist from Angola and the founder of 3D Studio Representa. For over eight years, I’ve been dedicated to architectural visualization using light, texture, and composition to turn ideas into images that feel lived-in and emotionally true. My work sits at the intersection of craft and storytelling: I treat every space like a scene in a film, shaping mood first and then perfecting the details.
There was a clear turning point. The first time I watched Alex Roman’s “The Third & The Seventh” and studied the stills of Bertrand Benoit, I understood that rendering could be cinematic, poetic and that it could move people. That realization, combined with the everyday light of Luanda and Benguela that I grew up observing, pushed me to take 3D seriously. I committed to mastering 3ds Max + Corona Render, photography fundamentals, and a disciplined workflow so I could express Angolan design sensibilities at a world-class level.
Today, beyond client work, I mentor new artists because I believe our region has a powerful voice to add to global visualization. Being featured by RebusFarm is part of that mission.
The Artist Behind the Scenes.
Could you describe your typical creative process when starting a new project, from ideation to completion?
My creative process always begins with intention. Before opening any software, I ask myself: what story should this space tell, and what emotion should it awaken in the viewer? From there, I gather references from architectural photography, cinematic stills, even textures and light studies from everyday life in Angola.
Once the concept is clear, I move into 3ds Max, where I block out the geometry and define the main composition. I carefully select assets and furniture pieces, making sure each element supports the overall mood. Lighting comes next; it’s the soul of the image. I usually build the lighting setup early on, testing natural daylight and then balancing it with artificial accents to create depth and atmosphere.
With the scene structured, I focus on materials and textures, making them as authentic as possible, wood grains that catch the light, fabrics that feel soft to the eye, and surfaces that carry subtle imperfections. This realism is what allows viewers to connect emotionally.
Finally, I render with Corona Render, often using RebusFarm to accelerate production. Post-production in Photoshop is the last step, where I fine-tune color grading and contrast to bring in a cinematic finish.
From ideation to delivery, my process is about one thing: building an image that doesn’t just look real, but feels alive.
What's the one tool or technique you couldn't live without?
If I must pick one thing it’s a light-driven workflow powered by Corona Render.
Corona is not just a renderer for me: it’s the technical heart of how I think images. Its IPR/interactive feedback lets me sculpt mood in real time; LightMix gives me final creative control over intensity and color without re-rendering; and its material system translates subtle imperfections (micro-bump, roughness variation, layered reflections) into believable surfaces that read emotionally on camera. Combined with high-quality HDRIs and physically accurate lights, this combo is how I turn a model into a living space.
How do you stay creatively inspired when working on long or challenging projects? Are there specific rituals or habits you follow to get into a creative mindset?
Small milestones each render test or lighting adjustment becomes a victory that keeps momentum alive.
I also rely on a few rituals to keep my creative energy sharp. I often start sessions by listening to cinematic instrumental music, which helps me visualize scenes, almost like storyboards from a film. I revisit the works of masters in photography and cinematography from Roger Deakins to Steve McCurry to reset my eye and remind myself of how light tells stories.
But perhaps the most important habit is simply observing real life. I take time to watch how the sun sets against buildings in Luanda, how textures age on walls, how shadows shift in a living room. These observations ground my digital work in reality and remind me why I love this craft.
When I combine discipline, reference, and real-world observation, I can stay creatively inspired!
What are the biggest lessons you've learned about managing deadlines and staying efficient?
One of the biggest lessons I’ve learned is that organization is the foundation of creativity. Deadlines stop being intimidating when your workflow is structured. I’ve built libraries of pre-mapped assets, HDRIs, and materials, so I don’t waste time reinventing the wheel on every project. This preparation frees me to focus on the artistic decisions that really matter.
Another key lesson is to plan backwards: I always start by mapping the final delivery date and then break the project into stages, modeling, lighting, texturing, rendering, and post-production, assigning realistic time blocks to each. This way, I can see potential bottlenecks early and adjust.
Finally, I’ve learned the value of iteration over perfectionism. Instead of chasing a flawless image in one go, I produce fast drafts, refine them, and build towards excellence step by step. This keeps momentum, prevents burnout, and ensures I deliver on time without sacrificing quality.
Project Spotlight.
Let's delve into your project "Living Room". What was the inspiration behind it, and what were the main challenges you encountered during its development?
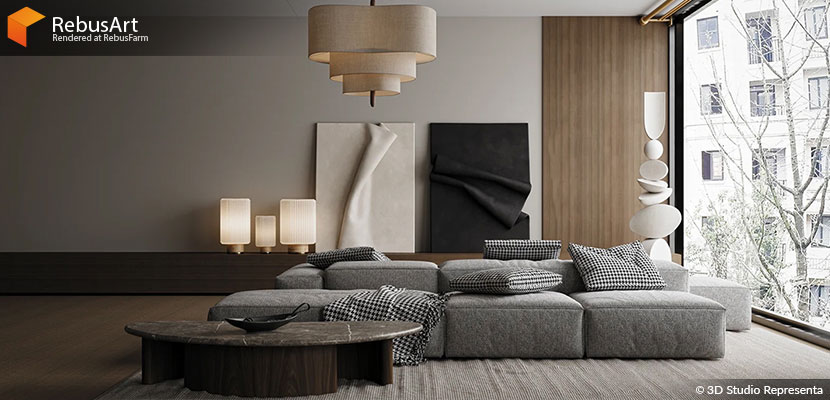
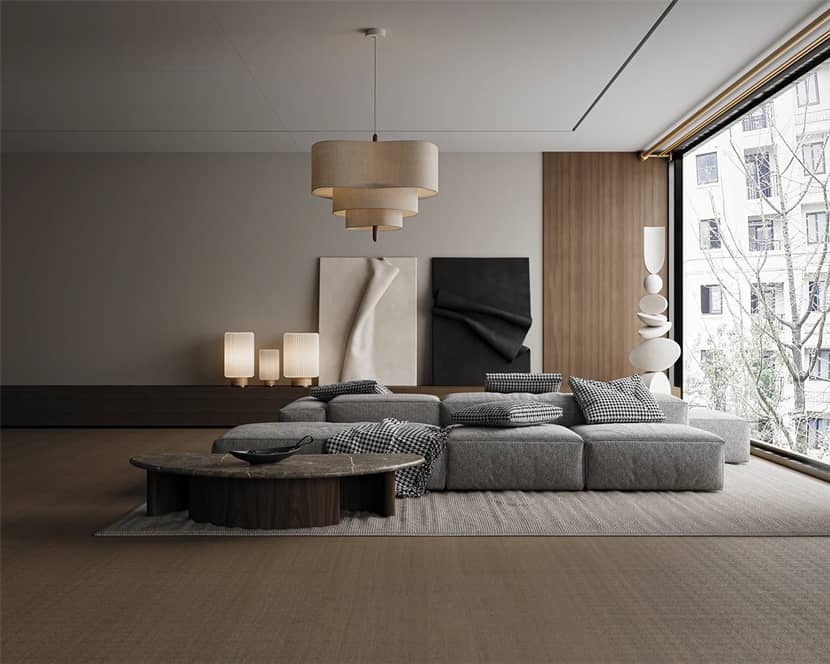
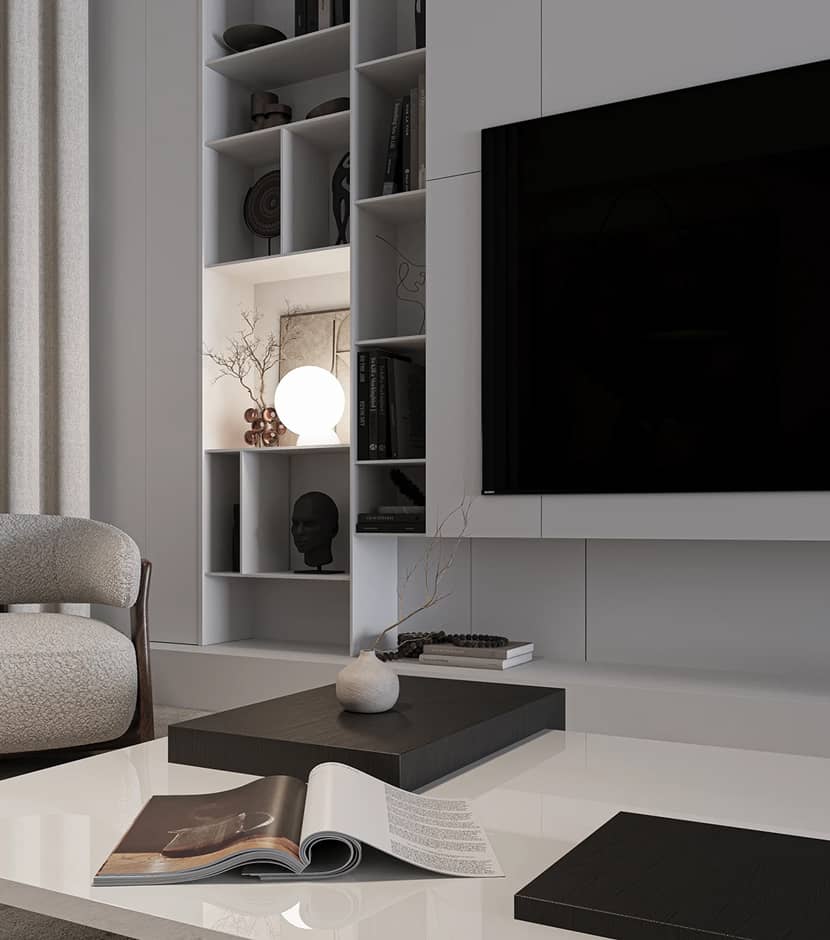
The Living Room project was born from a desire to create a space that felt both minimalist and deeply human. My inspiration came from observing how natural light transforms ordinary interiors in Angola, how a simple ray of sun through a curtain can make a room feel alive, intimate, and cinematic. I wanted to capture that quiet poetry of everyday life and translate it into a render that was both technically sharp and emotionally warm.
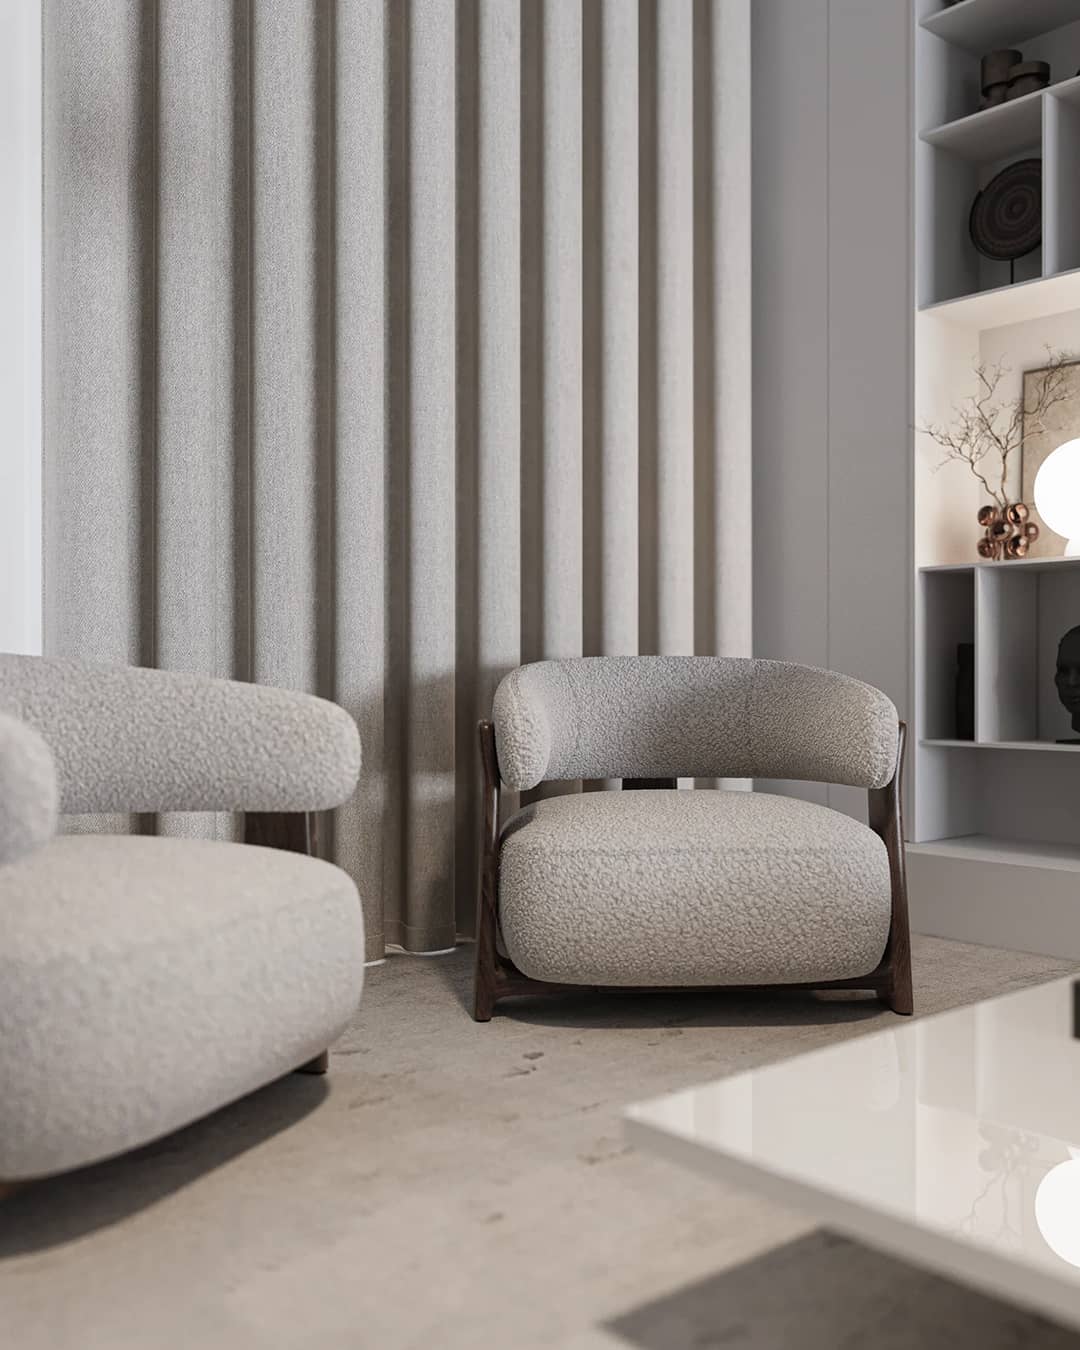
The biggest challenge was balance. Minimalism can easily look empty or sterile if not handled carefully. Every choice of sofa fabric, wood tone or the softness of the curtain had to serve the atmosphere without overwhelming it. Another challenge was achieving true photorealism in the textures: making the fabrics look touchable, the surfaces naturally imperfect, and the lighting believable.
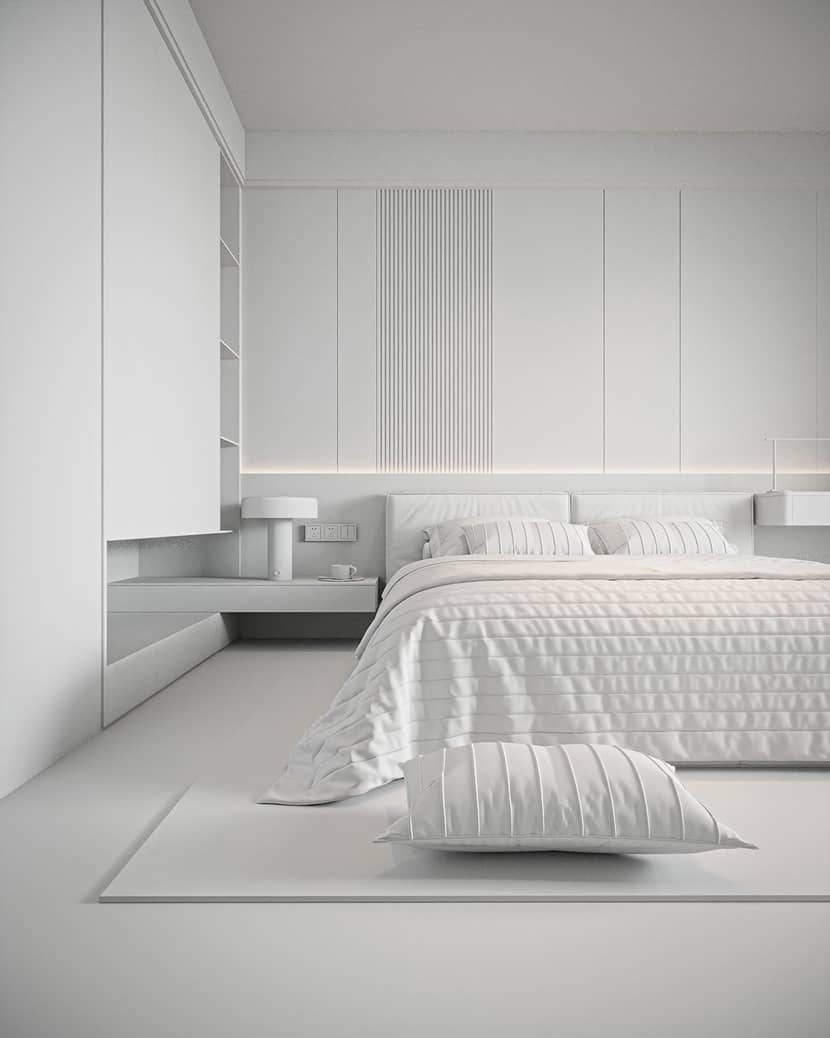
It was also a test of patience and discipline. Sometimes, the smallest adjustments, like shifting a camera angle by just a few centimeters or tweaking the exposure half a stop, made the difference between a good render and one that feels alive. That constant search for subtle perfection was the most demanding part of the process, but also the most rewarding.
What software, renderer and plugins did you use for this project?
For the Living Room project, I built the entire scene in Autodesk 3ds Max 2022, which gave me the flexibility and precision needed for architectural visualization. The rendering was done with Corona Renderer, my go-to engine for achieving natural light behavior, photorealistic materials, and a cinematic mood.
In terms of plugins and resources, I relied on:
- Corona Scatter & Chaos Cosmos for vegetation and accessory distribution.
- Forest Pack for additional realism in plant and detail placement.
- Quixel Megascans and custom high-resolution textures to ensure authenticity in surfaces.
- Photoshop for subtle post-production adjustments, color grading, contrast, and mood enhancement.
This combination of tools allowed me to move fluidly from modeling to rendering to final polish, ensuring that the technical process never stood in the way of the artistic vision.
How did rendering this project at the RebusFarm Render Service impact your workflow, and were there any specific features or aspects of the service that stood out to you?
Rendering the Living Room with RebusFarm was a turning point in my workflow. What would normally take many hours on my local machine was completed in a fraction of the time, giving me the freedom to focus on artistic decisions instead of waiting on technical processes.
The aspect that impressed me the most was the reliability and speed. I could upload my scene, track the progress in real time, and receive consistent, high-quality results without worrying about crashes or hardware limits. Features like the easy integration with 3ds Max + Corona and the RebusDrop system made the whole process seamless even for heavy, high-resolution.
In short, RebusFarm didn’t just save me time, it allowed me to deliver with confidence, knowing that the technical backbone of my project was in safe hands. It felt like having a professional render farm team working right alongside me, which is invaluable for an artist aiming to push quality while meeting deadlines.
Can you provide some step-by-step breakdowns of the project?
Here’s a clear, end-to-end breakdown of Living Room from blank page to final delivery.
1. Concept & Intent:
- Define the feeling: calm, minimalist, warm.
- Success metric: the image should make the viewer exhale (comfort > spectacle).
- Moodboard: 12–16 refs (light behavior, fabrics, wood tones, composition frames).
2. Space Planning & Blocking (3ds Max):
- Real-world units (m). Block primary volumes first: sofa, rug, coffee table, curtain wall.
- Keep proportions honest; no “cheating” scale for drama.
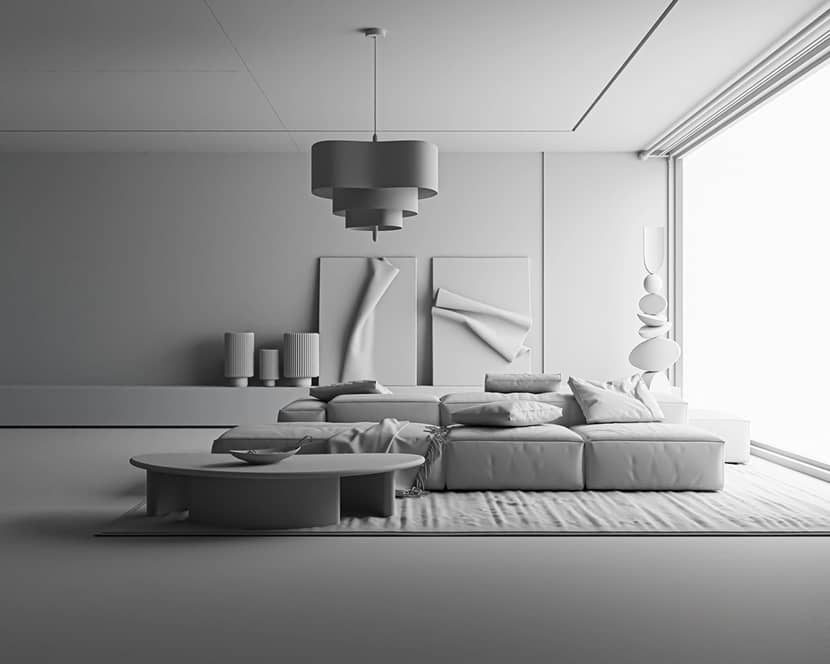
- Add a temporary clay material to everything to evaluate form and light first.
3. Camera & Composition:
- Focal length: 28–35mm for a natural interior feel (no extreme wide).
- Camera height: 1.4–1.6 m (seated eye-level vibe).
- Lock verticals (no keystone). Build leading lines with rug and furniture edges.
- Compose for one hero material (e.g., the sofa fabric) and one secondary rhythm (curtain folds).
4. Lighting Design (Corona)
- Base: soft HDRI daylight through the window (late-afternoon angle).
- Add Corona Sun very low for gentle directionality (if needed).
- One warm practical (lamp) as a character light; the rest stays restrained.
- Use LightMix from the start: separate Daylight / Practicals / Rim-Fill so you can balance without re-render.
5. Materials & Textures (PBR)
- Fabric: micro-roughness variation + subtle sheen; normal + bump layered.
- Wood: color variation per plank (multitexture/randomization); soften reflections.
- Don’t use pure blacks/whites; keep albedo realistic to prevent energy loss.
- Use Triplanar where seams could break immersion (curtains, large walls).
- Tiny imperfections (fingerprints, smudges) only where the eye will actually go.
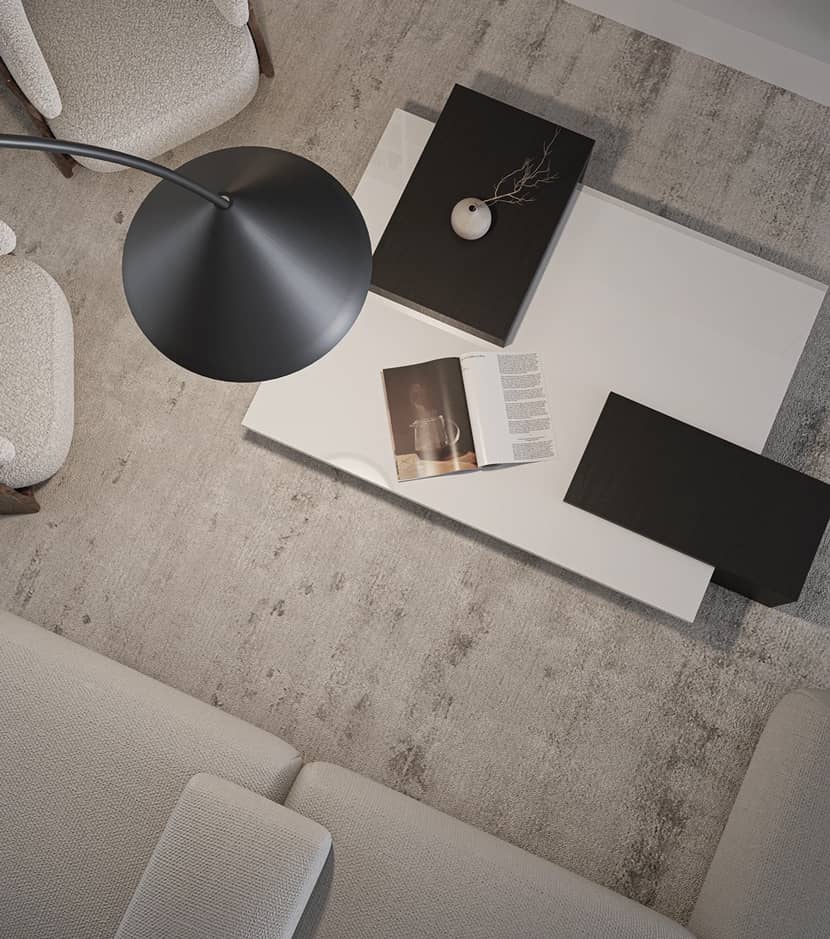
6. Detailing & Story
- Add lived-in cues: a folded throw, two books, a ceramic tray.
- Keep the count low; negative space is part of the design.
- Nudge rotations off-axis by 1–2° it breaks the CG “grid” feel.
7. Optimization & Cleanliness
- Instance repeating assets; convert heavy items to Corona Proxy.
- Consolidate textures (4–8K only where the camera needs it).
- Remove hidden geometry, freeze completed sets, name layers clearly.
8. Preview & Iteration
- Do clay previews for light/composition only.
- Histogram check: no crushed shadows, no clipped highlights.
- Three passes of review: A) composition, B) materials, C) light mood.
- Change one variable at a time; save LightMix presets.
9. Final Render Setup (Corona)
- Resolution: 4–6K long edge for print flexibility.
- Stop condition: Noise level ~2–3% (or passes to taste).
- Denoiser: Corona High Quality (subtle).
- Render Elements: CShading_Beauty, LightMix, Cryptomatte, ZDepth, CMasking_ID/WireColor for control in comp.
- Corona VFB tone mapping starting point:
- Highlight Compression ~2–3
- Contrast ~3–5
- Subtle Bloom/Glare (keep it elegant)
10. RebusFarm Submission
- Relink/collect assets, strip unused maps, confirm gamma 2.2.
- Test a quarter-res job first; validate LightMix and denoiser behavior.
- Launch the full job; monitor frames in RebusDrop; note render time vs. noise target.
- Benefit: farm time replaces waiting, so I keep iterating on color/light decisions.
11. Post-Production (Photoshop / VFB)
- Work in 16-bit. Minor S-curve, gentle color balance toward warm midtones.
- Local dodge & burn on fabric highlights; preserve texture.
- Very light vignette (lens-based, not obvious).
- Optional LUT at low opacity if it serves the mood (never to “fix” bad lighting).
12. Delivery & Social Cuts
- Master: 16-bit TIFF (sRGB) + layered PSD.
- Delivery JPEGs in 4–6K and social crops (4:5, 16:9, 9:16).
- Caption lines ready (credits, tools, thanks to RebusFarm).
Quality Checklist I used:
- Verticals perfectly straight?
- Hero fabric reads tactile at 100% zoom?
- LightMix balanced so whites aren’t gray and shadows aren’t crushed?
- One focal story, zero clutter?
- At least one area of quiet negative space?
Time-savers that mattered:
- Prebuilt LightMix and asset libraries (so I focus on art).
- Clay first, materials later (faster decisions).
- Short farm tests before final (confidence in the last push).
Closing.
Looking back at your journey as a 3D artist, what do you consider to be your most significant milestone or achievement thus far, and why?
Looking back, the most significant milestone of my journey has been this very moment being featured by RebusFarm. For me, it represents much more than a personal achievement: it is proof that an artist from Angola can reach the global stage, standing side by side with talents from around the world.
This recognition validates years of dedication, discipline, and sleepless nights spent perfecting details that most people might never notice, but which make all the difference in a render that feels truly alive. It also marks a turning point: from being just a student of the craft to becoming a reference point for others in my region who dream of pursuing 3D at the highest level.
Why is it so meaningful? Because it shows that art has no borders. What began as a passion in Luanda and Benguela is now inspiring others internationally. For me, this milestone is not the end of a journey, it is the beginning of a larger mission: to help shape and represent a new generation of African 3D artists ready to shine worldwide.
Are there any new art movements, developments, or industries (e.g. AI, gaming, film, virtual reality) that you're excited to explore further?
Absolutely. I’m very excited about the way artificial intelligence, gaming, and real-time visualization (VR/AR/Unreal Engine) are reshaping the creative landscape. AI is not replacing creativity, it’s becoming a powerful co-pilot, accelerating workflows and opening doors to entirely new visual languages.
What advice would you give to aspiring 3D artists who are just starting their careers or looking to take their skills to the next level?
Master the fundamentals, stay disciplined, and never stop learning.
Don’t just chase software tricks learn how to see. Study light, shadow, photography, architecture, and cinema. These are the foundations that will make your renders feel alive, no matter which tool you use.
Build habits of consistency. Practice a little every day, create personal projects, and don’t be afraid to fail forward. Every imperfect render is a stepping stone to mastery.
Invest in quality assets and reference professional libraries of materials, HDRIs, and models.
Finally, what's next on your artistic horizon? Are there any exciting projects or goals you're eager to pursue soon?
The next step is to expand Representa 3D Studio to the world. I want to turn this milestone with RebusFarm into fuel to launch new trainings, create even bolder projects, and put Angola on the global map of 3D visualization.
My goal is simple yet powerful: to inspire, to teach, and to prove that rendered dreams can change real destinies.
Thank you for sharing your insights and expertise with us!

About the artist
Fernando Muhongo is a 3D artist and the founder of 3D Studio Representa. Based in Angola, he has been dedicated to architectural visualization for over eight years, specializing in the use of 3ds Max and Corona Renderer to create images that balance realism with storytelling. Drawing inspiration from Angolan light and international masters of photography and cinematography, Fernando’s work brings architectural spaces to life with warmth and authenticity. Alongside his client work, he mentors emerging artists, aiming to amplify the voice of African talent in the global visualization industry.