

Performance is a constant problem when creating large digital worlds, whether they be open-world environments, extensive forests, or congested cities. Memory, draw calls, texture streaming, and polygon counts are all strained during large-scale rendering. For both offline and real-time renderers to generate quick, reliable outputs, efficiency and detail must be balanced. We'll dissect twelve tried-and-true methods in this article to maximize large 3D sceneries without sacrificing visual fidelity. Read the article and learn more about these handy tips!
These guidelines hold true regardless of the 3d tools you're using in your workflow. Remember that you may queue your finished renders on RebusFarm to free up your local hardware for more work when they're ready.
Tip 1 - Block Out Terrain And Lock Cameras Early.
The foundation of any successful large-scale scene is simplicity. Determine your camera angles and block out your terrain before getting into the specifics. By defining the composition and camera distances early on, using height maps or simple primitives can save several hours later. You can precisely budget detail levels based on camera proximity once your primary shots are set.
Why this matters: determining your final scale and field of view (FOV) early on helps you distinguish between what can be simplified or replaced with texture maps and what actually requires geometric detail.
Watch the two video tutorials below for a deeper understanding of the "Block Out" term and how to apply it.
By examining the work of Maxim Dorov, who is renowned for his self-assured and methodical approach, the artist in this tutorial shows what makes a 3D environment blockout genuinely effective. The essential takeaway is to lock your primary camera early, steer clear of continuously shifting viewpoints, and spend significant time honing composition, forms, and silhouettes before detailing. Stable, visually balanced, and free of superfluous camera movement, a strong blockout should convey a coherent narrative. Because excellent surroundings can appear tough until the very end, the movie encourages patience, confidence, and trusting the process.
Three primary methods for rapidly blocking out environments and level designs in Unreal Engine 5 are described by the instructor in this lesson. He begins by demonstrating the use of BSP Brushes, the traditional UE4 technique for quick prototyping using basic primitives. He then presents the more recent Modeling Mode, which enables artists to make and modify 3D meshes right within UE5. To prevent the content browser from becoming cluttered, he suggests using Dynamic Meshes. He concludes by discussing the third technique, which uses pre-made modular elements to quickly put scenes together. To create playable settings before adding final materials or details, the video focuses on iteration speed, flexibility, and efficient workflows.
Tip 2 - Split the Landscape Into Camera-Facing Tiles.
There should never be a single monolithic mesh across vast terrains. Sort your surroundings into tiles according to the perspectives of your cameras. Only what the camera sees is loaded or scattered because of this segmentation, which enables effective visibility control.
Tile-based setups also let you apply unique LOD rules or material optimizations per section. For example, a forest far in the background can use lightweight vegetation proxies, while near-camera areas maintain full geometry.
By tailoring scene objects according to camera visibility, this iToo Software lesson shows how to significantly increase performance in Forest Pack for 3ds Max software. Three fundamental methods are described by the instructor: camera culling to remove unseen objects, distance-based density falloff to thin out vegetation far from the camera, and Forest LOD to automatically switch materials and geometry by distance. Even for animated or VR camera configurations, these techniques work together to minimize render items by more than half without sacrificing apparent quality, maintaining the efficiency of complex landscapes.
Tip 3 - Plan With Placeholders for Major Elements.
Don't rush into every detail when creating complex cities or landscapes. For important constructions like bridges, skyscrapers, or landmarks, utilize low-poly placeholders instead. This maintains the responsiveness of your scene and facilitates early validation of lighting composition, occlusions, and proportions.
You can change composition without having to redo heavy assets if you postpone final details. For efficiency, replace placeholders with polished versions or outside references after they have been locked.
Watch this informative video tutorial: "This is How You can Handle Large 3D Scenes" by InspirationTuts.
The instructor shows how to use proxies to manage big 3D scenes. To maintain scene responsiveness, replace intricate geometry with lightweight placeholders. It demonstrates workflow strategies for managing large environments effectively, regulating visibility, and switching between proxies and full meshes.
Tip 4 - Go Procedural: Spline/Parametric Systems for Reusable Assets.
When it comes to large-scale rendering, proceduralism is your best friend. For uniformity and speed, use spline-driven arrays for cables, railings, fences, and roadways. These systems eliminate the need for hours of human alignment effort by automatically adjusting to the height of the terrain.
You can drive several systems, such as a road surface, its guardrails, and nearby lighting, with a single control spline with tools like RailClone or Geometry Nodes, guaranteeing flawless synchronization throughout your environment.
iToo Software demonstrates how to procedurally create entire city environments by combining RailClone and Forest Pack in this advanced lesson. In order to use RailClone for road networks and urban infrastructure, the movie discusses setting up the city grid, filling streets with buildings, integrating greenery, and optimizing layout logic.
Although iToo Software's RailClone and Forest Pack are only compatible with 3ds Max, several alternative products from various platforms provide similar procedural modeling and scattering features.
For parametric roads, facades, and vegetation systems, Blender artists frequently use Geometry Nodes, which provide versatility comparable to that of RailClone and Forest Pack combined.
With its SOP networks, Houdini offers even more procedural control, making it perfect for production-scale city creation, road layouts, and foliage instancing.
Plugins such as SurfaceSpread and MoGraph's Cloner system effectively manage object dispersion and variation in Cinema 4D.
Autodesk's motion graphics toolset, MASH, is available to Maya users for procedural object placement and randomization.
In the meantime, native tools like the Foliage System, Spline Components, and Procedural Content Generation (PCG) framework allow for non-destructive, camera-aware scene construction that is comparable to iToo operations in real-time engines like Unreal Engine or Unity.
Tip 5 - Add Subtle Randomization To Kill Repetition.
Frequently, procedural generation results in observable repetition. Controlled randomness is the solution. Introduce tiny variations in rotation, scale, hue, and UV offset for recurrent assets like trees, windows, or rocks. Uniformity can be broken and realism restored with even a 5% variance.
Keep these adjustments plausible; too much variance can come across as disorganized. For outcomes that are organic but repeatable, use seed-based randomization.
Tip 6 - Limit Unique High-Poly Variants; Prefer Transform Noise.
Establish a precise budget for variations. Start with a few simple models and utilize transform noise to mask reuse rather than producing thousands of distinct high-poly trees or structures. Pay attention to silhouettes; the observer won't notice repeated geometry if an object's shape appears distinct.
Buildings, rocks, cars, and even crowd assets are all subject to this theory. Hero items near the camera should have their own high-poly models saved.
Tip 7 - Choose The Right Container: Scene Geometry vs Proxy vs Reference.
As scenes expand, the way geometry is loaded and stored becomes just as important as the actual assets. For hero objects that need to be adjusted directly, use live geometry; for heavily repeated assets (trees, furniture, and cars), use proxy systems; and for common libraries across projects, use external references.
Memory use, load speed, and file size are all impacted by the kind of container. For instance, Blender's linked libraries or 3ds Max's proxies enable quick viewport interaction without saving each vertex in memory. Additionally, team members can collaborate in parallel without compromising the main scenario thanks to external references.
This video shows how to optimize big scenes in 3ds Max by creating and exporting V-Ray proxies in this brief video. Attaching all object components, modifying the pivot point, collapsing modifiers, and creating lightweight VRMESH files with the V-Ray Mesh Exporter are all steps in the process. Additionally, the video demonstrates how to effectively load and display proxies, which lowers viewport load while preserving render detail, a crucial procedure for handling intricate V-Ray projects.
This short tutorial introduces the basics of using XRef Objects in 3ds Max, a feature that allows you to reference external models into your current scene without importing them directly. A vital approach for collaborative workflows and large-scale environments, the instructor shows how to insert and manage connected objects to keep project files smaller and easier to update.
Tip 8 - Build a Distance-Based LOD Plan (Geometry, Texture, Shader).
Large-scale ecosystems rely on an efficient Level of Detail (LOD) system. Establish geometry and texture reductions for each of the three distance bands—near, mid, and far. Mid-range assets employ smaller textures and simplified meshes, far assets depend on low-poly models and atlas-based materials, and near objects maintain all of their detail.
Use geomorph or cross-fade transitions between LODs to avoid popping. For smoother switching, include velocity and angle checks in real-time engines. This can be manually simulated by offline renderers by varying render layers or visibility.
Tip 9 - Scatter Top-Down: Trees → Shrubs → Ground Cover.
Start large and work your way down while filling natural landscapes. First, disperse the large objects that establish composition and silhouette, such as rocks and trees. Fill in the medium details, such as plants and shrubs, next. Lastly, include little components like pebbles or leaves.
Overpopulation is avoided and sensible density changes are maintained with the aid of this top-down procedure. Keep in mind that natural gaps are a necessary component of realism; not every square meter of forest floor needs to be covered.
This tutorial walks you through using Forest Pack together with Quixel Megascans to populate landscapes. It covers preparing assets, scattering logic, density control, and optimization tricks. While it’s done in 3ds Max + V-Ray, the techniques apply broadly to procedural scattering in large environments.
Tip 10 - Use Cluster "Patches" for Micro Vegetation.
Disperse clustered areas rather than single blades for weeds, grass, or moss. These clusters make density and variation easier to handle and drastically cut down on draw calls. To get rid of any evident tiling or grid patterns, blend patch edges with subtle falloffs.
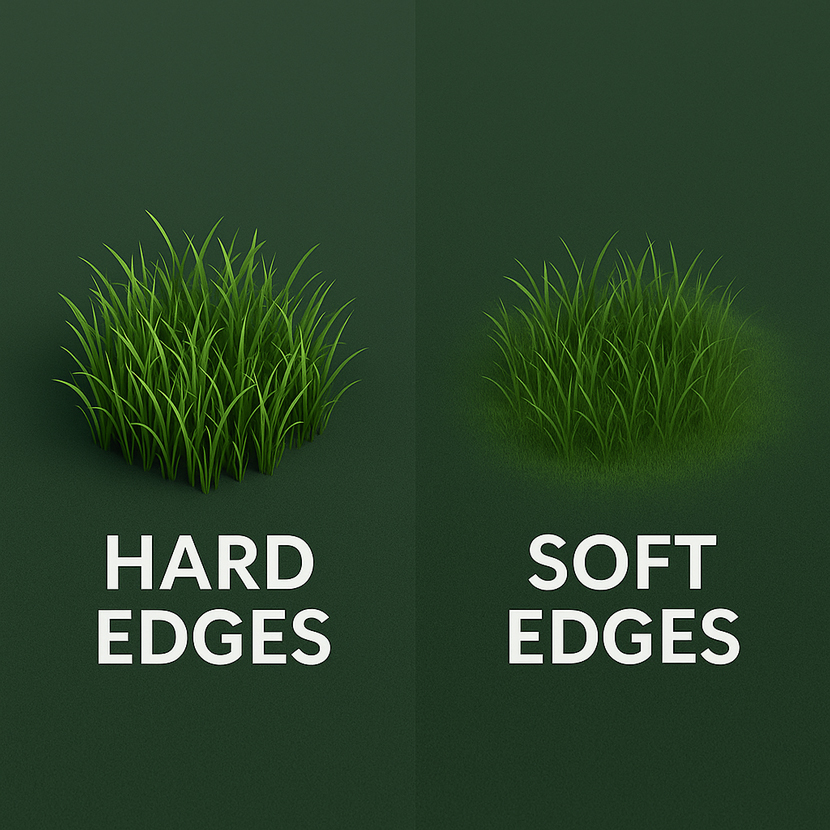
Clusters, as opposed to single elements, are scattered to preserve convincing complexity without taxing system resources excessively.
This short tutorial from iToo Software shows how to quickly assemble a city layout using Forest Pack’s cluster feature. By assigning color IDs to different building types, users can automatically group and randomize structures into organized zones. Originally designed for plant distribution, this clustering system proves equally powerful for urban layouts, allowing rapid procedural generation of city blocks with controllable size, shape, and blend between zones.
Tip 11 - Control With Splines: Exclusions, Includes, and Shared Curves.
Vegetation and scatter systems function best when governed by precise rules. To include particular areas, such as walkways or clearings, and to exclude areas beneath buildings, water, or highways, use splines and masks. The same spline can even be used for both modeling and scattering systems; for instance, a sidewalk's defining curve can also power nearby lamps or grass growth.
Hours of manual editing are saved by this single control, which also preserves visual logic.
This short clip shows how to use open splines (with adjustable thickness) as both inclusion and exclusion boundaries in Forest Pack, enabling control over where vegetation is placed or omitted.
Tip 12 - Bake, Cache, and Profile for Final Render.
Make sure your scene is stable before starting your final render. For static objects, use ambient occlusion and baked lightmaps. Heavy simulations, such as particles, fabric, or hair, should be cached on disk. Reduce material calls and maintain predictable VRAM usage by including textures into atlases.
To avoid misunderstandings in big teams, group layers into several categories: working, baked, cached, and final.
For cloud rendering on render farms, for example, you can upload the finished version to RebusFarm to take advantage of scalable cloud computing after your local render tests are clear. You'll be able to render more quickly and free up your workstations for other projects.
The author of this comprehensive guide demonstrates how to successfully combine dynamic and baked lighting in sizable Unity scenes. The approach concentrates on baking interiors, such as rooms, for visual fidelity while maintaining exterior dynamics for performance, as opposed to baking entire worlds, which is time-consuming and resource-intensive. The video shows how to use ambient occlusion decals (AO planes) to ground objects without extensive baking, convert baked lightmaps into materials, and reuse them in prefabs. This method provides excellent lighting with optimal performance, making it perfect for large-scale projects, mobile, and virtual reality.
For additional cloud rendering tips beyond scene optimization, see our detailed guide: How to Optimize Your Project for Online Cloud Rendering
What to Do Next.
Make sure your scene is stable before starting your final render. For static objects, use ambient occlusion and baked lightmaps. Heavy simulations, such as particles, fabric, or hair, should be cached on disk. Reduce material calls and maintain predictable VRAM usage by including textures into atlases.
Thank you for reading! We hope this article with the many basic tips helped you understand how to optimize large-scale 3D scenes efficiently. We would also like to thank Dawn Global for kindly sharing with us the article's cover image.
To wrap up this article and witness the power of a truly optimized 3D environment, take a moment to watch “Westin Residences by Marriott International". A Visual Journey by Dawn Global Studio. It’s a stunning example of how efficient scene management, thoughtful lighting, and smart rendering can come together to create a seamless, cinematic experience.
Location: Sector 103, Gurugram
Scope: Full CGI – Still Renders & Walkthrough Animation
Client: Whiteland Corporation
Kind regards & Keep rendering! 🧡
About the author
Vasilis Koutlis, the founder of VWArtclub, was born in Athens in 1979. After studying furniture design and decoration, he started dedicating himself to 3D art in 2002. In 2012, the idea of VWArtclub was born: an active 3D community that has grown over the last 12 years into one of the largest online 3D communities worldwide, with over 160 thousand members. He acquired partners worldwide, and various collaborators trusted him with their ideas as he rewarded them with his consistent state-of-the-art services. Not a moment goes by without him thinking of a beautiful image; thus, he is never concerned with time but only with the design's quality.
![]()
![]()
![]()
![]()
![]()
