Friday, November 12th, 2021 by Mahmoud Salah
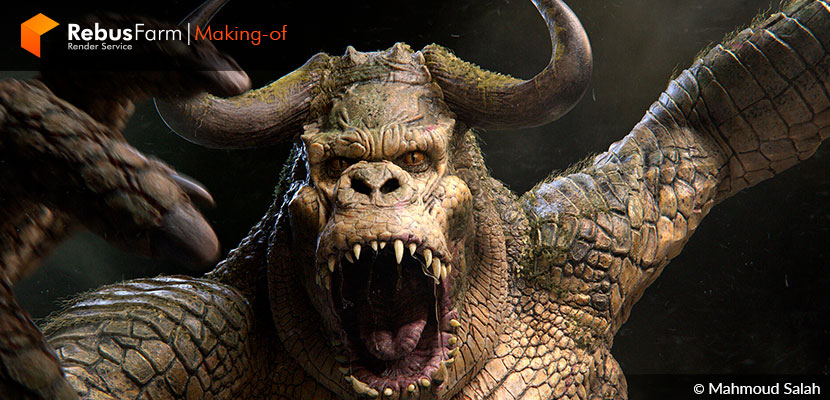
The impact of Grocodilla is undeniable and the power of his eyes and scary, dry skin is something that only great know-how and experience can achieve. Creature and character artist, Mahmoud Salah really details the process of creating this amazing character and shares tips that can take your work to another level.
Let's dive deep into the world of GROCODILLA!
Hi! My name is Mahmoud Salah, born and raised in Egypt. I worked in post-production for more than 10 years before moving to Canada and joining the movie industry to focus on character and creature modeling and texture work. Since then I've worked on many projects, such as The New Mutants, The Mandalorian, Midway, Deadpool 2 and Avengers: Infinity War.
The concept for the GROCODILLA is fairly simple, mixing strong animals of Africa. Reference is your best friend, collect as much as you can for each part of your creature. I got lots of it, gorilla skeleton, crocodile eye, crocodile eye close up, crocodile arm, crocodile claw close up, crocodile skin, crocodile skin close up. You got the idea.
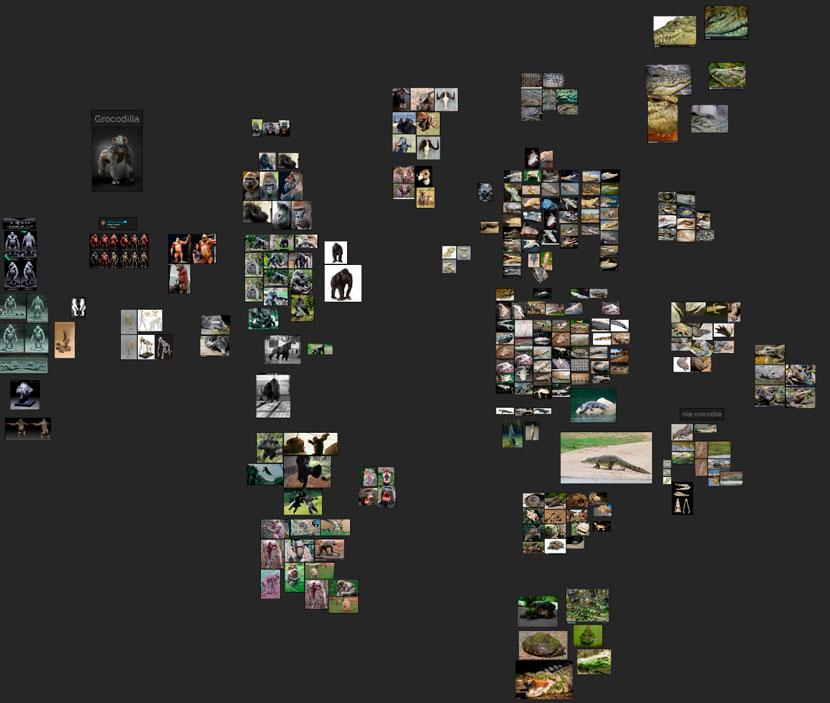 Reference gathering for character development.
Then I did my own bad concept, just photoshop photo bashing.
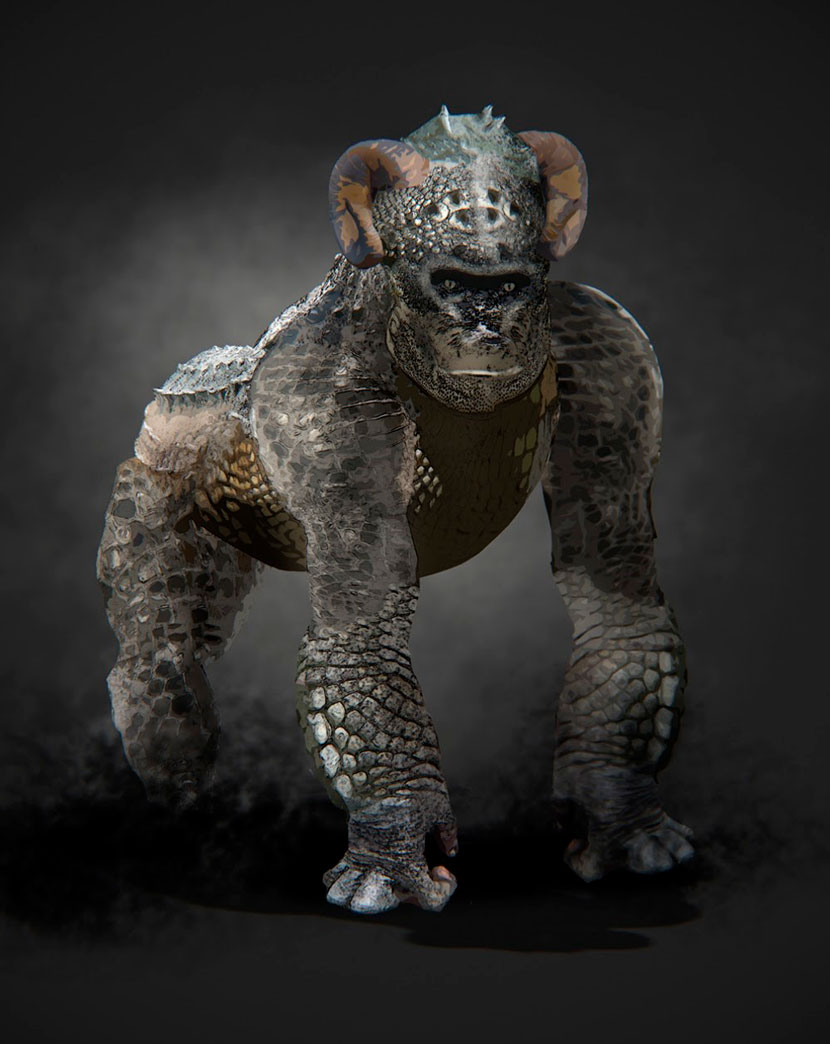 The first raw concept in Photoshop.
Modeling
Started with blocking the body using the 'Nickz_humanMaleAverage' provided by ZBrush. Then added sub-tools when needed like for the tail, teeth and horns. At this stage, I don't care much about topology or details, only the big shapes' proportions and the whole feel of the concept.
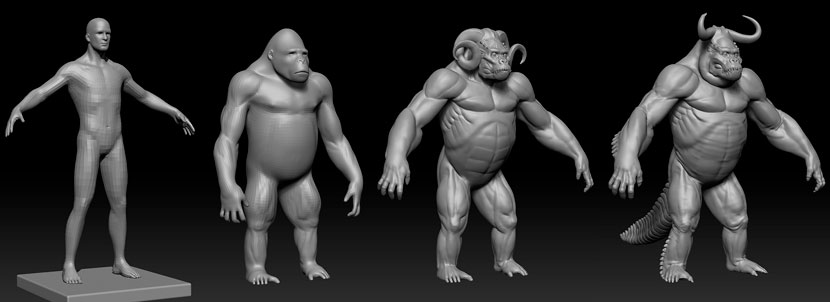 Modeling in ZBrush.
After I'm okay with the blocking, it's time for retopo. I send the Decimated version from Zbrush to Maya, using the Quad draw tool to retopo the model.
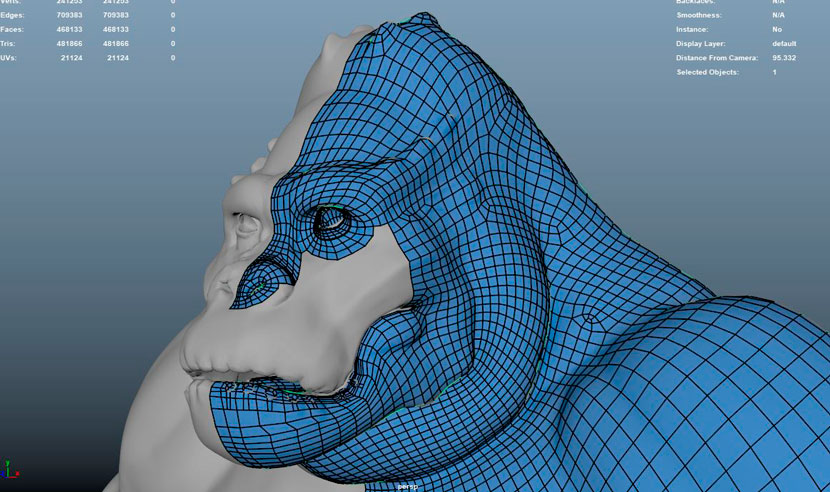 Retopoing in Maya.
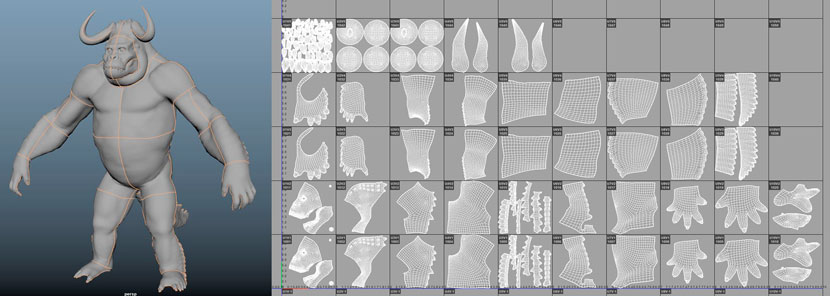
All done? Time for UV unwrap.
I unwrapped the UVs in Maya UV tools and laid them out in around 40 UDIMS to get the best quality for texture later on.
Getting some crocodile scan maps from TEXTURING XYZ will play a huge role in our texture and detailing process. Please check their tutorials page for great learning resources.
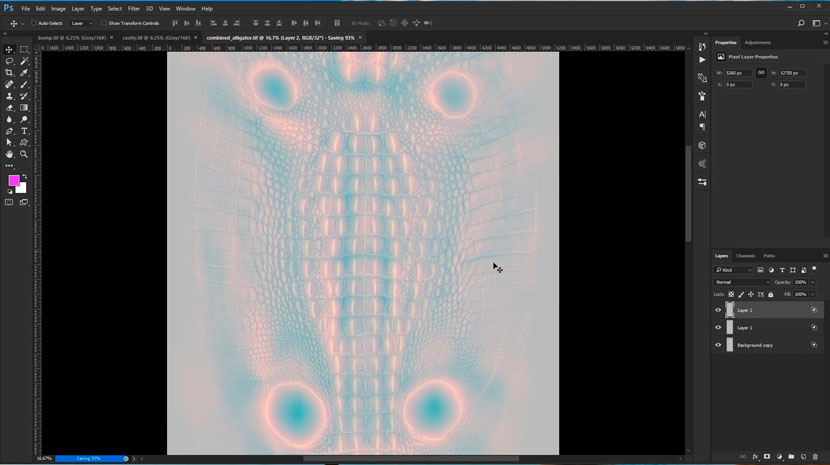 Skin texture asset from TEXTURES XYZ.
You will get 3 maps, displacement, bump and cavity. Combine them as RGB each one has one channel.
Note! After we finish with all the projection of it in Mari will use it in Zbrush to sculpt it. But only using the displacement channel, the bump and the cavity we will use in Maya to give us all the nice crispy details we lost during ZBrush sculpting. To get really sharp details in Zbrush you will have to go crazy with subdivision levels and polycount, which most of the time you can't reach by the standard workflow.
It's Mari time! While working with scales I like to give myself some guides, this will help me align the scales projection. It will make your life easier.
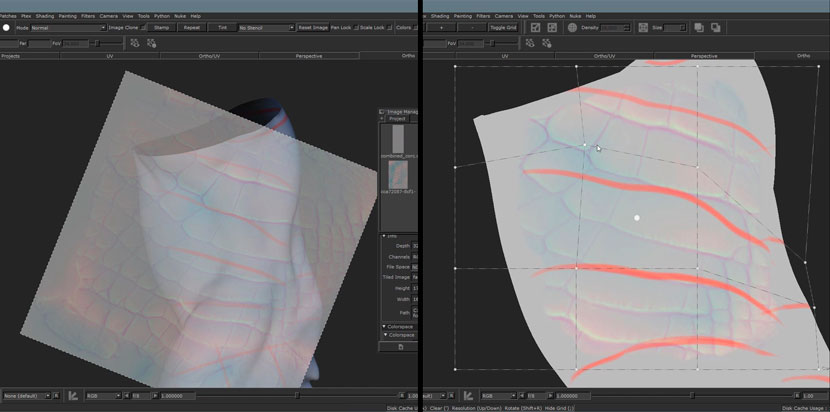 Skin texture asset from TEXTURES XYZ.
Very important note! Your displacement projection should be on a 32-bit channel and make sure your paint buffer size is big enough, like 8k or more if you can. Also, keep checking from while to while that you didn't scale your buffer or zoomed it in or out. Please and thank you.
You can also check your projection by applying it as bump on a shader in Mari. It gives you a rough idea of how it will look like.
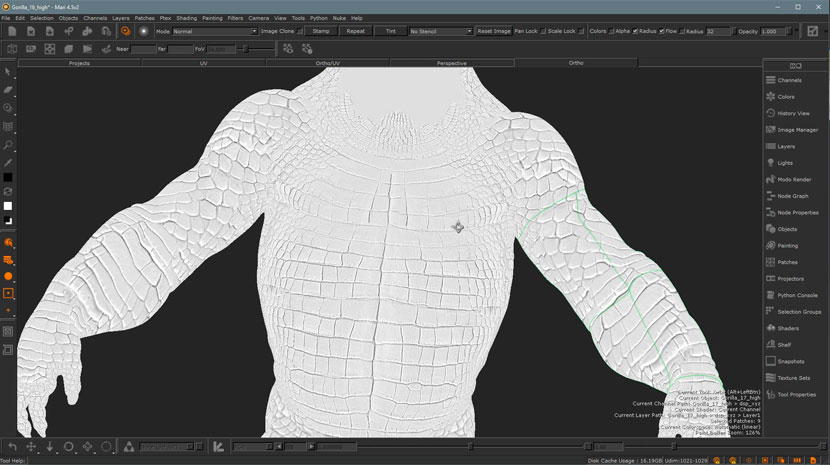 Checking the projection in Mari.
After some good hard work, the scales projection is done. Time to export it.
Remember we have 3 different channels, ZBrush can't separate channels in import, we have to export each one separately. We only need the displacement and bump, Exp R and G channel.
Let's jump to ZBrush.
In ZBrush, I will go to the higher SDiv level, add two layers for the bump and Displacement, and then use the free UDIMS importer plugin to import my maps and apply them to the model. I Will do the same for the bump and Displacement, will rework and resculpt on the Displacement layer ad the bump one just as a reference for me but we will use it later in Maya as a Displacement layer on top of Zbrush Displacement.
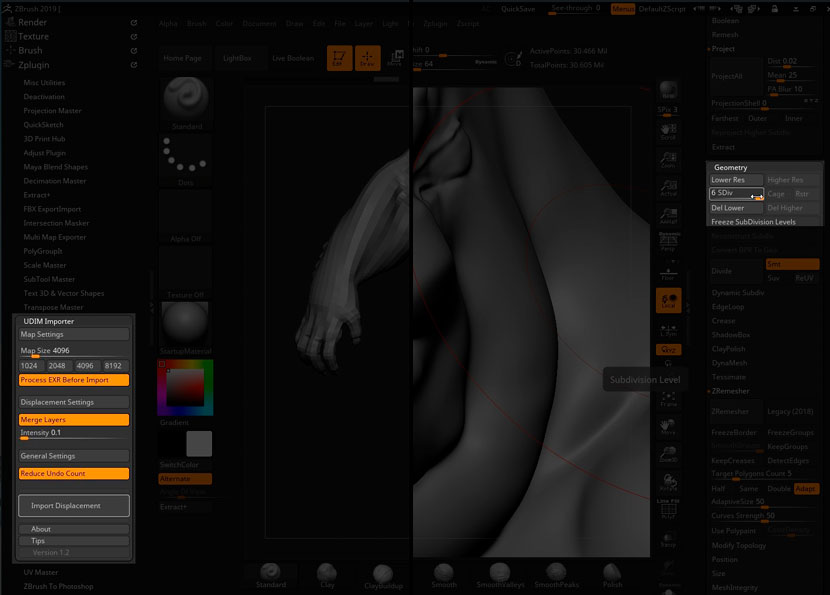
 Layering in ZBrush.
As you see here, we have really good results already!! But it needs a lot of cleaning and improvement. Take your time and enjoy the process, now we will get serious with detailing.
For the face/head details it's all hand sculpt or using custom alphas, I couldn't use TEXTURE XYZ scans for the face.
This is an example of the custom alphas I made.
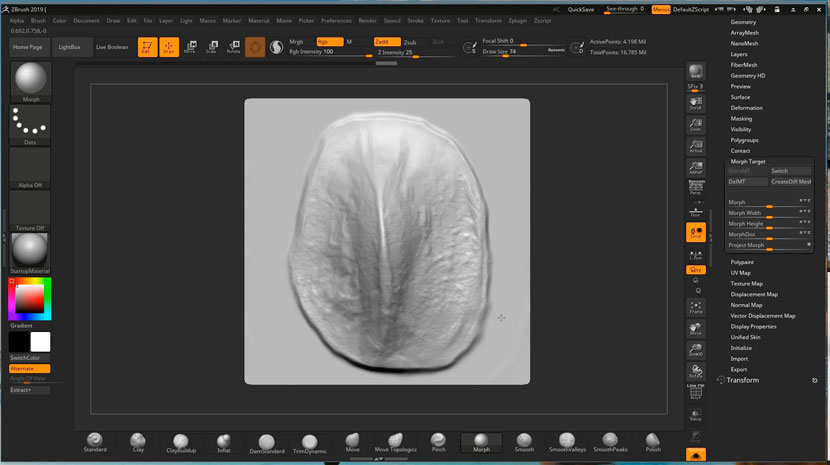 Custom alpha for the scales.
Now it's time for a texturing journey! Where's Mari?
Texturing
In Mari, I will do my best to keep everything in a non-destructive workflow. It means you use as much procedural work as you can, heavily depend on masks and only put your hard paintwork where it needs to be.
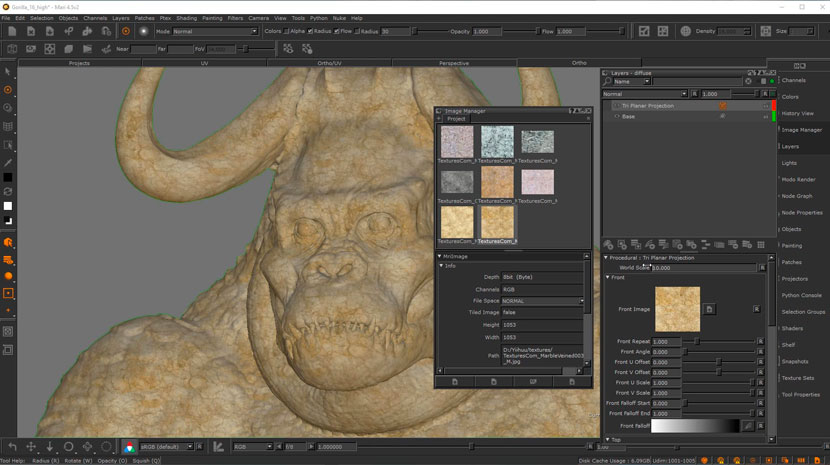 Masks in Mari.
From textures.com I will collect some marble textures, they are great for creature skin work. Apply as a base and work your way up.
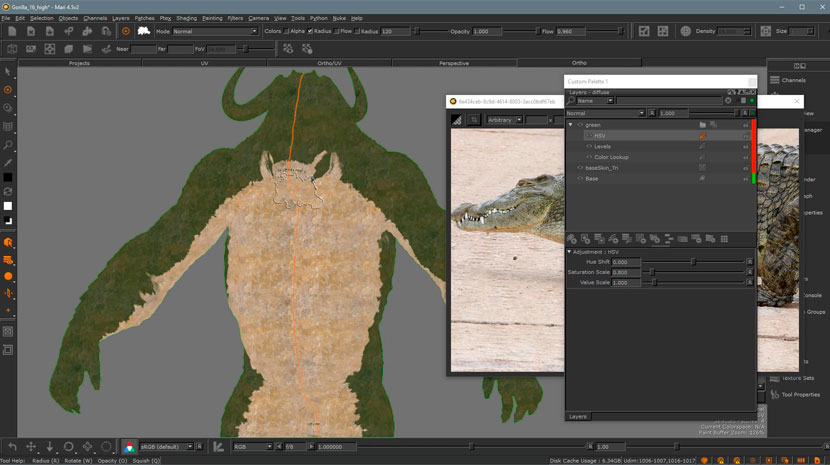 Marble textures.
On top of the base will have some color-correct adjustment layers in a group and only work on the mask.
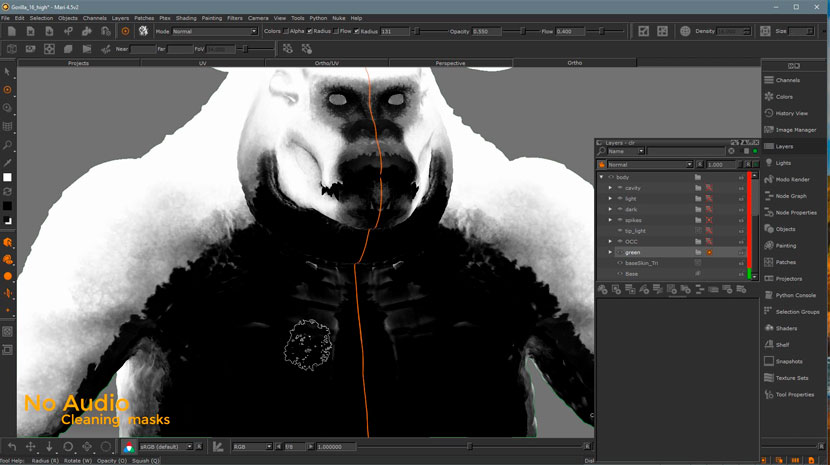 Color adjustments.
Some cool tips for workflow here.
Use the displacement that has all your hard work to extract supporting maps, such as curvature and cavity. The ones ZBrush generates tend to be very pixelated.
By applying High Pass Filter in Mari you can retain the high-frequency information within an image while reducing the low-frequency information.
Then using levels or contrast tools to crush the values, you can have results like this:
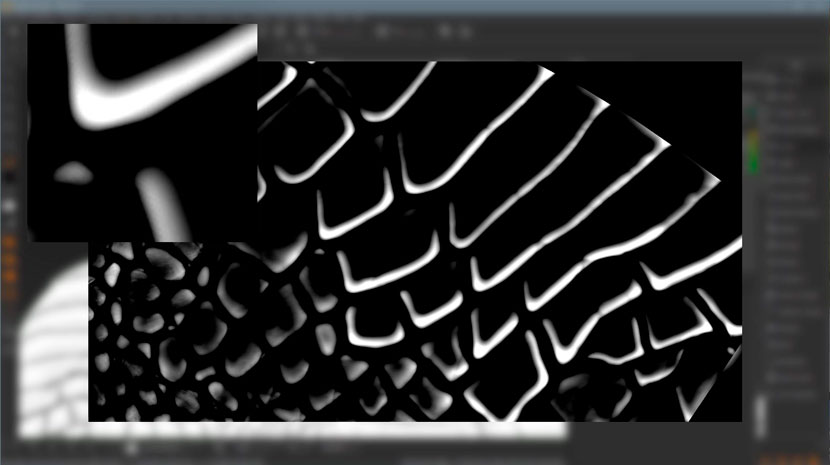 Contrast tools.
By adding grunge maps on top of the cavity map we just made, with some level of adjusting, we can have organic masks for creases.
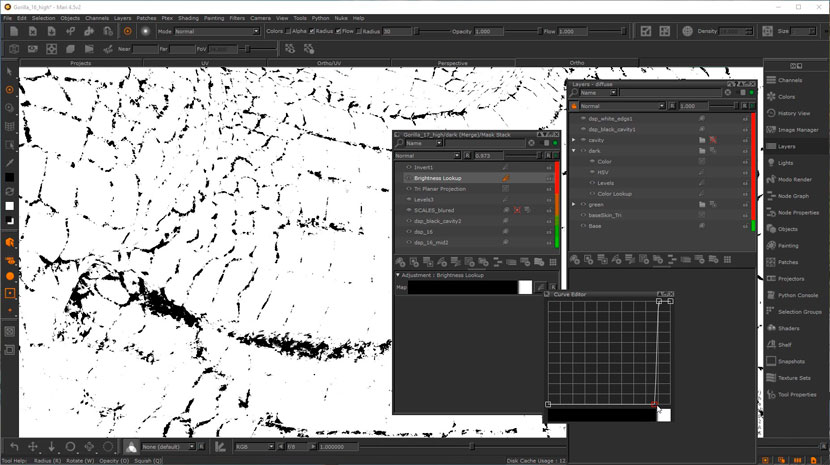 Organic masks for creases.
Using a blurred version of the Displacement is very helpful for your texture work. I will use it as a mask with a simple orange color layer, then contrast is to have something like this:
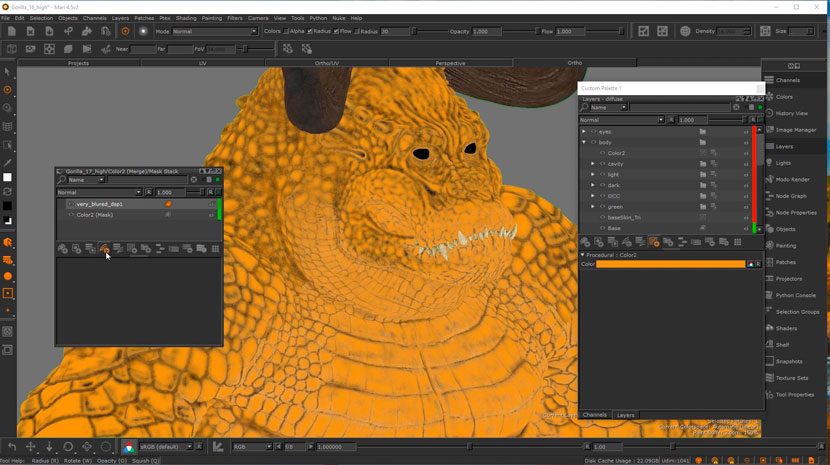
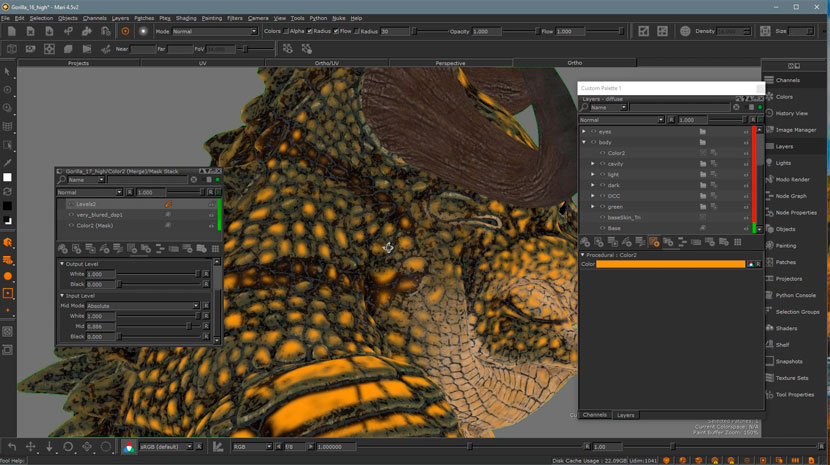 Contrasting masks
Lower the opacity and mask out the parts we don't need and we can get a fake translucent skin effect. Notice it on the green color.
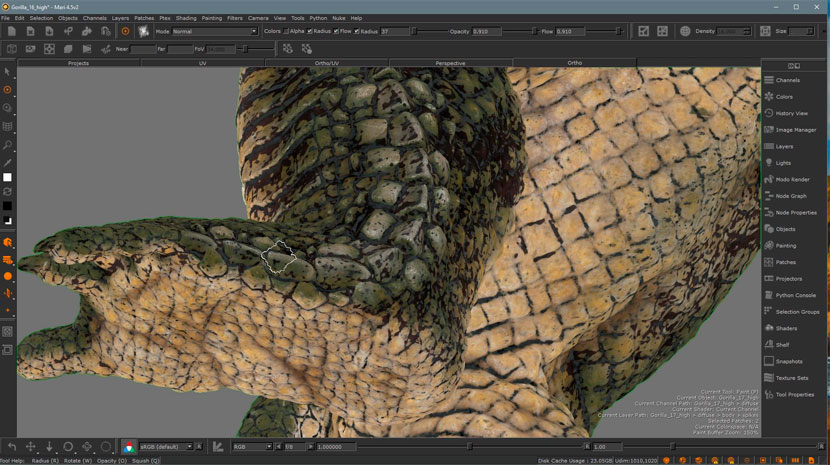 Translucent skin effect.
Very similar technique with the big spikes, but this time will use grey marble texture to give the feeling of dry skin, looking awesome already. Nails and claws are just a wood texture with small tweaks.
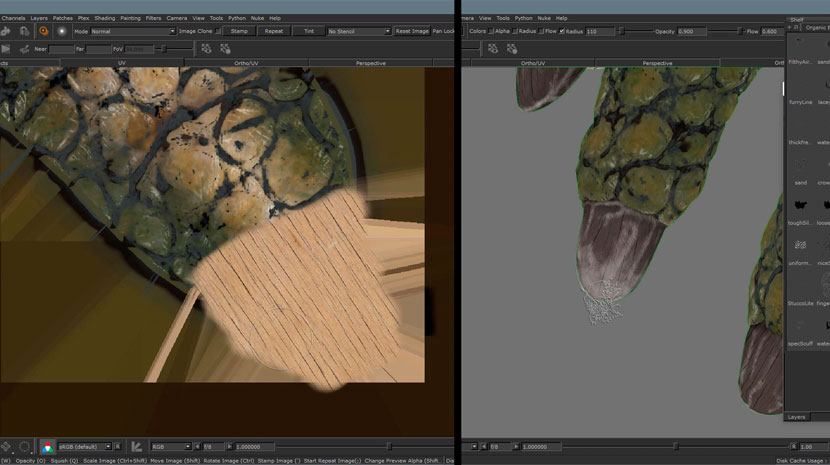 Adjusting wood texture for the nails.
The eyes are just the simple 'crocodile eye' projected and enhanced.
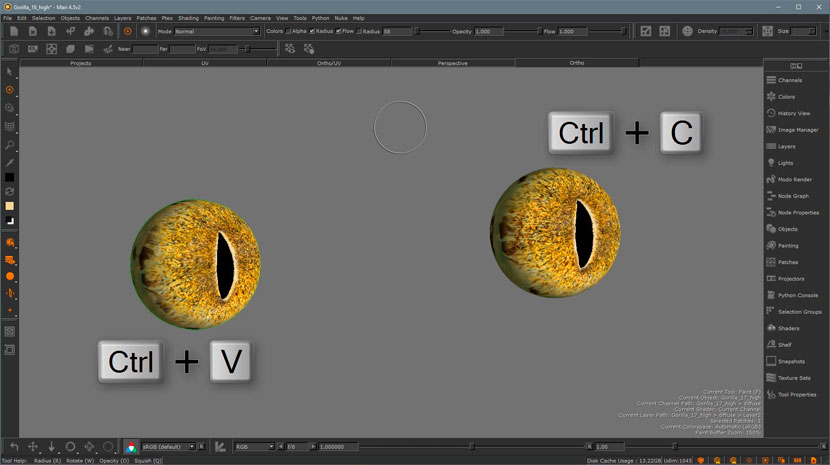 Crocodile eyes.
Guess what? I will use once again marble texture! This time use the same tile as color and mask. On top of your colorwork to have an extra feeling of dry skin.
You will get a similar result. Don't forget to add it to your pump layer.
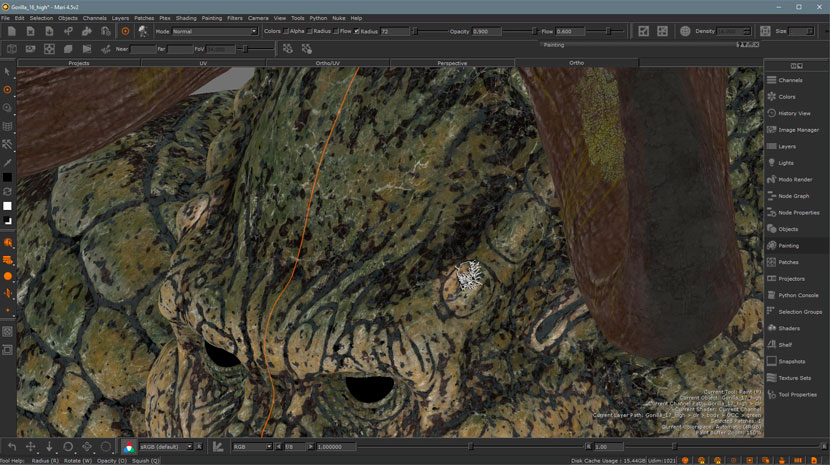 Marble texture mask.
At this phase, the skin painting is done. For all the dirt, mud, moss, or any other textures that I need to find in the body, I will make separate channel masks. For example:
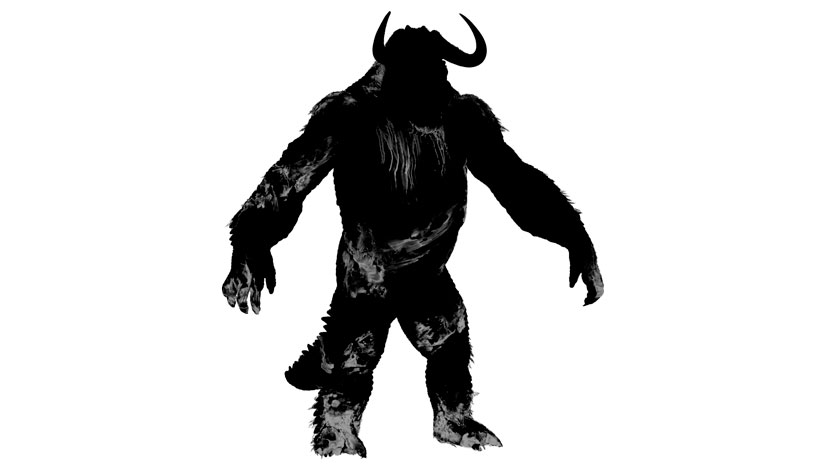 Mud mask channel.
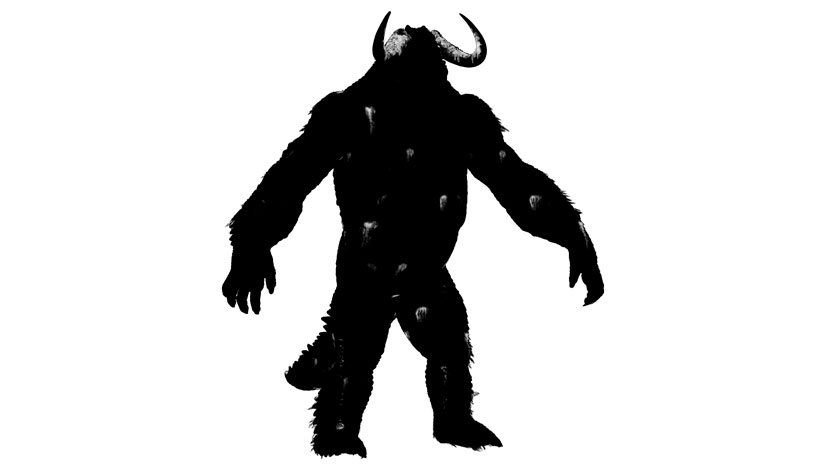 Green moss mask channel.
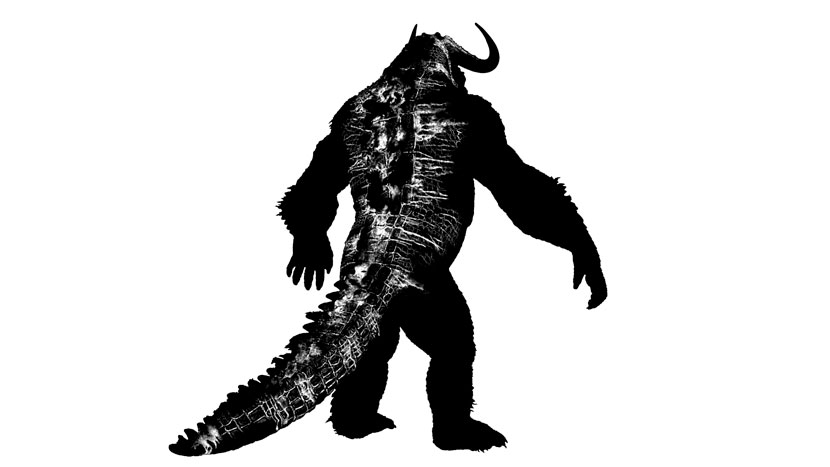 Dry sand mask channel.
Let's jump to Maya renderer by Arnold. I will use the Arnold layer shader and stack my shades on top of each other, masking them with those masks we just did.
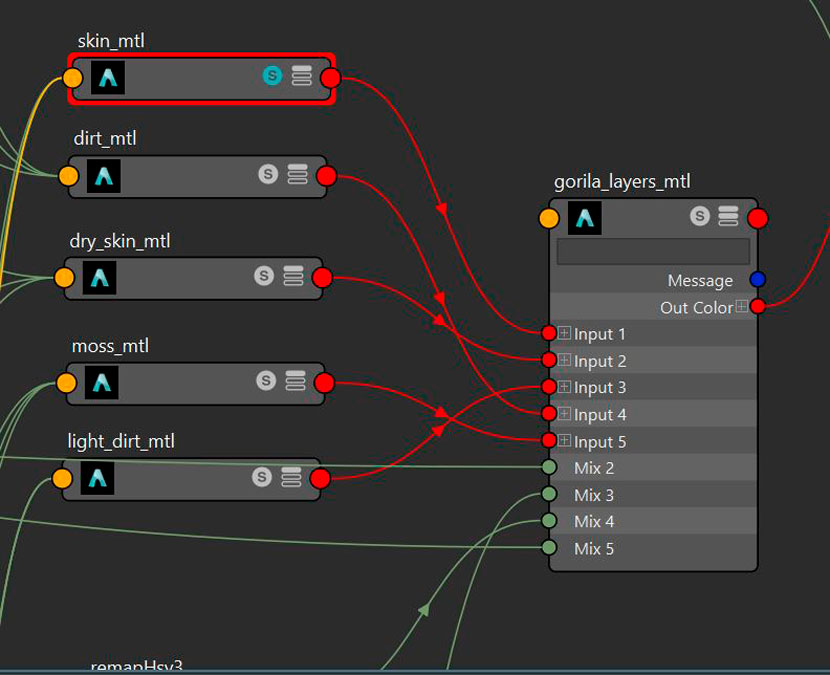 Arnold layer shader.
Now the final shader tree. Don't get intimidated it's actually not complicated.
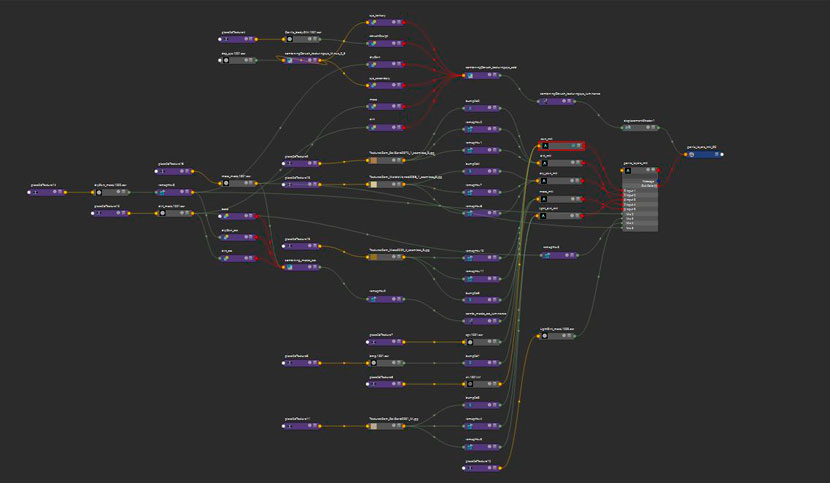 Arnold final shader tree.
Very important to use your masks on the displacement too, to get the feeling of layering such the mud and dry skin on top of your skin.
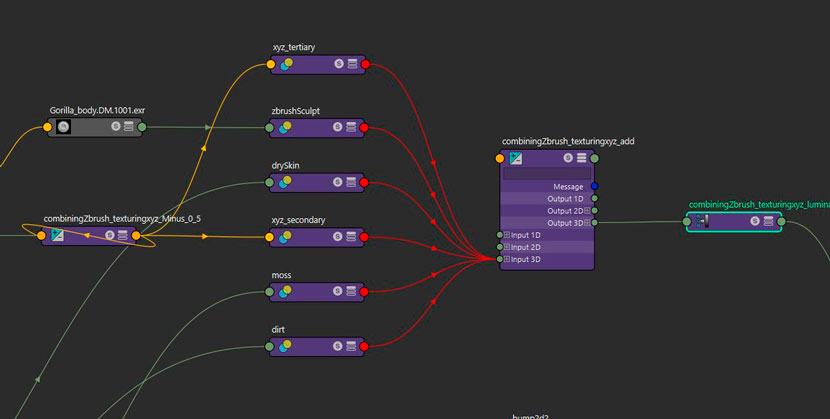 Layering displacement masks.
For more information please visit TEXTURING XYZ's tutorials.
Also, I will make some quick XGen work to add hanging moss and tree leaves.
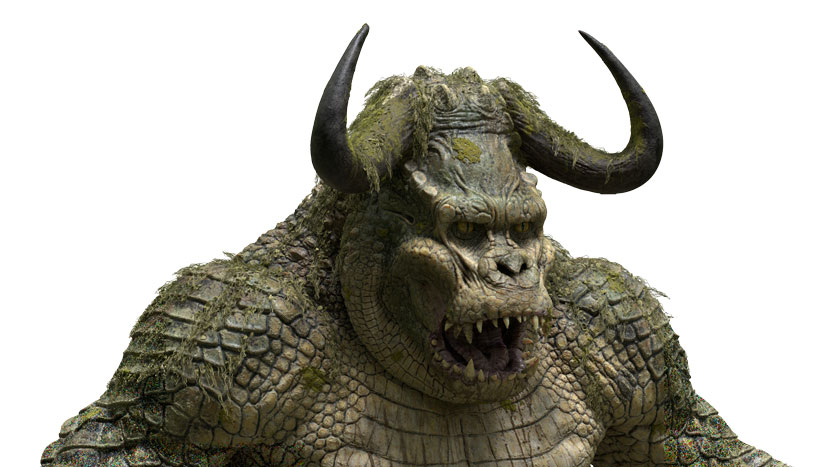 Textures of moss and leaves with XGen.
Now we are ready for posing, lighting and rendering.
I do the posing in Zbrush using Transpose master, sending the OBJ to Maya and using it as blendshapes or Transfer Attributes. In Arnold renderer, I used subsurface for almost all the shaders, lighting based on some area lights and one domLight.
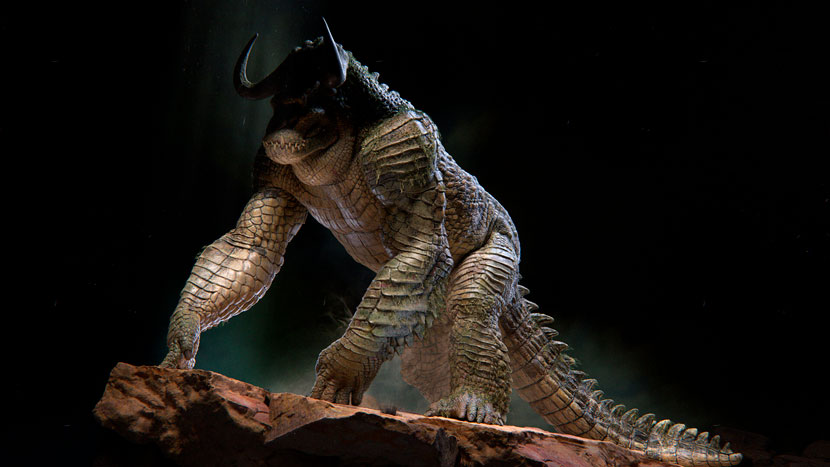
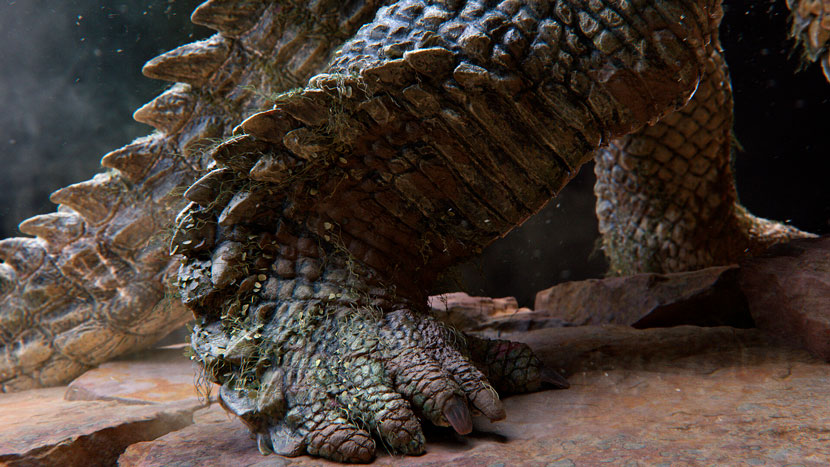
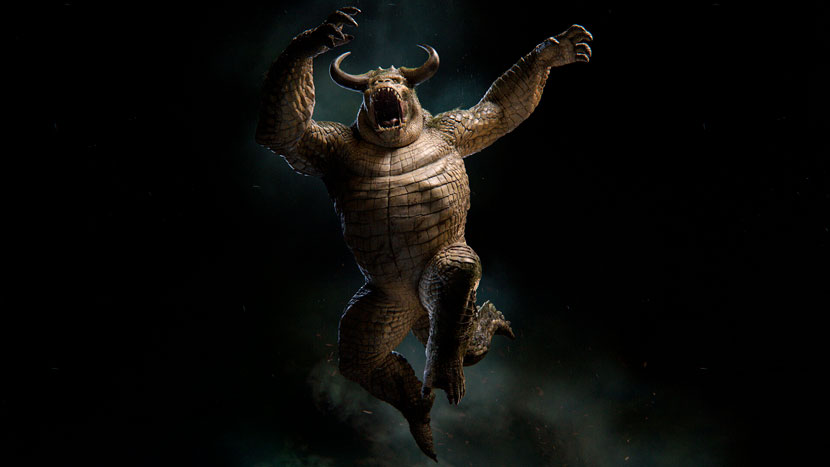
Hope I covered some interesting information here, for an in-depth step-by-step full course please consider getting your copy from WingFox.
We thank Mahmoud for sharing his detailed process and sharing with our Rebus community all of his tips and tricks! Check out more of his work on his social media channels:
Want to share your work with our community too?
Contact us at Cette adresse e-mail est protégée contre les robots spammeurs. Vous devez activer le JavaScript pour la visualiser.and tell us about your favorite project.
>> Read more articles on our blog
